File-Based Import
File import is in beta. It's stable enough for daily use. But we haven't tested bank CSV files in a large enough data set. Bugs are expected.
Manually entering transactions can sometimes be tedious. Maybe you didn't enter your transactions for a week, or more. Whatever the reason, file-based import is here to help speed up this process. The best part is it works on mobile or tablet!
File Format (CSV)
Centsible has made the choice to support a single file type, CSV. The reasoning for this is it's widely available. This doesn't mean other file types couldn't be available in the future.
The file content itself only has two rules.
Rule One: The first line of the file must describe each column. Essentially the title row. Example, date, description, amount.
| Date | Description | Amount |
|---|---|---|
| 9/18/23 | Pizzaria | 7.55 |
| 9/15/23 | Grocery Store | 56.25 |
In the image above you see an example of what it looks like to prepare the CSV import. Rather than force everyone to edit a bank CSV to conform to a specific format, we've opted for flexibility. You tell us which column is for the date or amount. This is why the first line must be the column titles.
Rule Two: There must be at least a date and amount. This is simply the bare minimum necessary to make a transaction.
How To Import Your Bank File
Step One
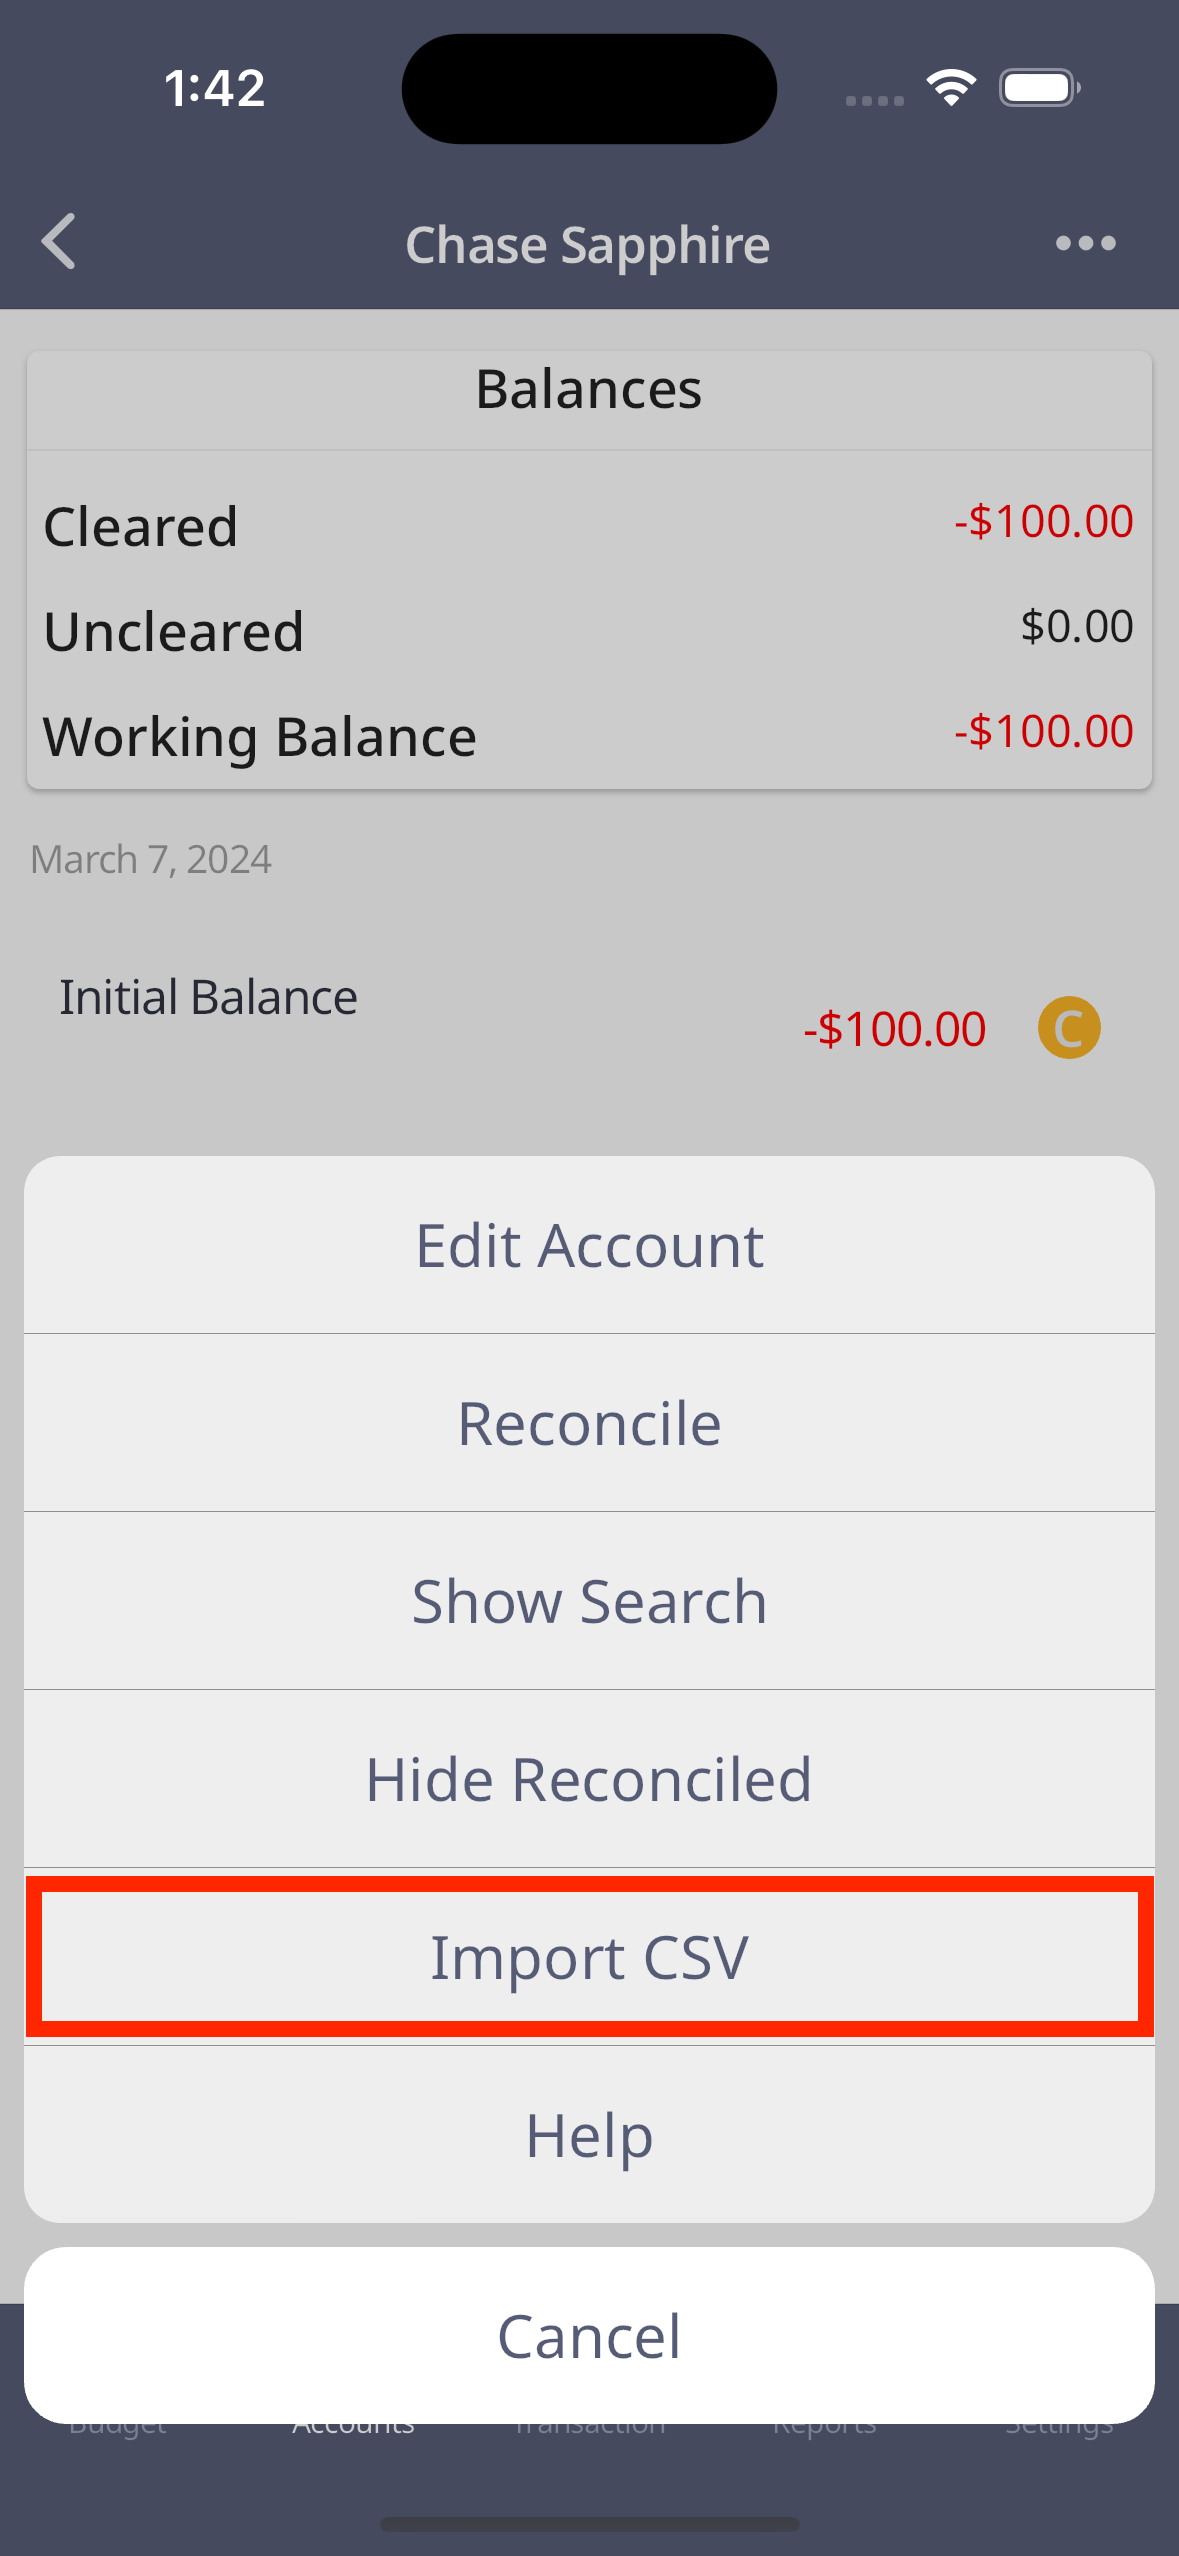
In order to import your bank file for your bank account, go to the account in Centsible. Click on the menu button at the top right of the account's transaction list screen. Then click the "Import CSV" item.
Step Two
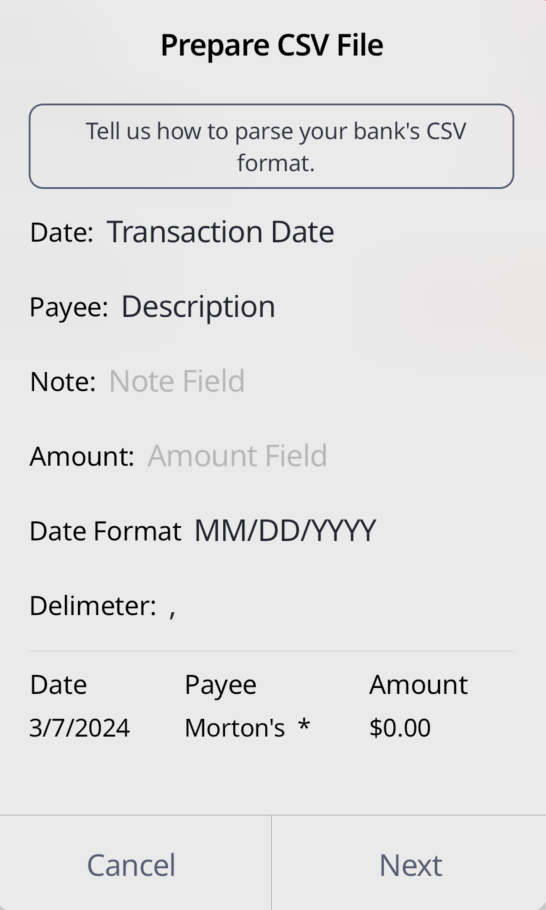
Next you will be presented with the "Prepare CSV File" dialog. You tell us which columns relate to these fields for a transactions:
- Date
- Payee
- Note
- Amount
- Date Format
- Delimeter
At the bottom you get a sample transaction to make sure it looks good before continuing. Click next.
Please note the CSV parser does not currently support the currency symbol or commas in the amount field. Just the numbers, decimal, and negative sign. This is just a limitation that will be improved on in the future. Otherwise all the rows will be ignored as it can't be parsed.
Step Three
After clicking next you will be taken to the "Import CSV" screen. On this screen Centsible does a few things before showing you the final list of transactions.
- Any transactions prior to the date when you first added the account on Centsible will be removed.
- Transactions prior to your last reconcile date, minus 5 days, will also be removed. This is an optimization. If you reconcile this means all your transactions prior to that date have been entered.
After these filters are applied, you will see something like the list below.
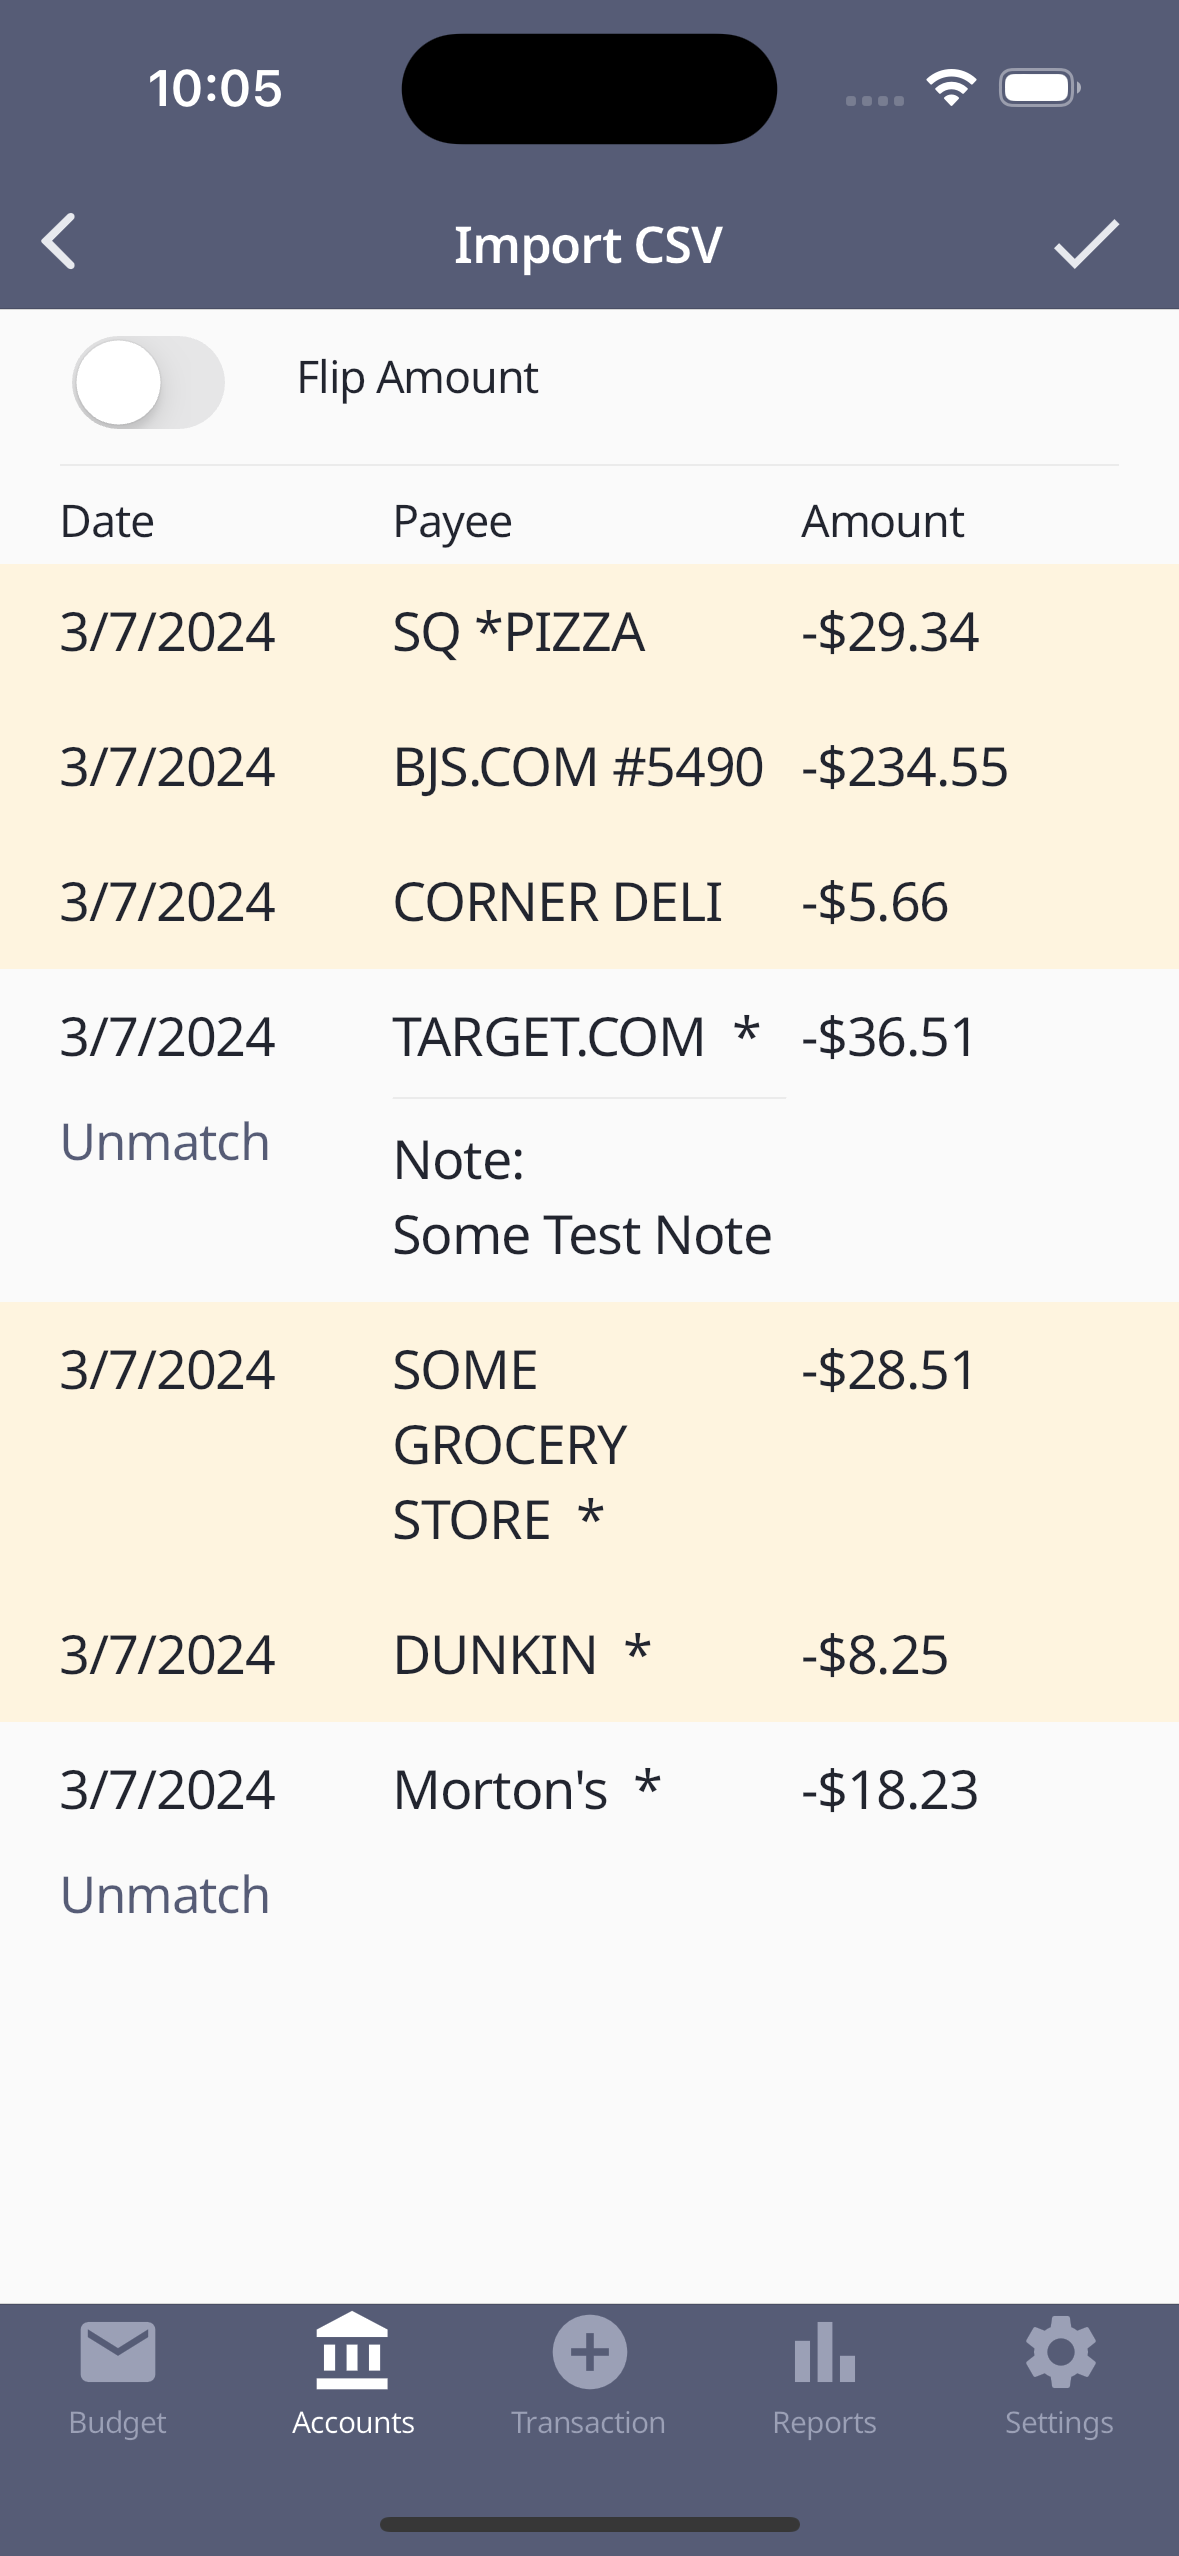
Centsble attempts to find a match for each transaction you are importing with all your current transactions. They match when the amount is exactly the same and the dates are equal or at least 10 days apart.
Transactions that have not found a match are highlighted in yellow for convenience. Those will be imported. Transactions that have found a match are not highlighted. Additionally, you will have the option to unmatch the transaction to force import it in the event of matching issues. If there are matching issues, please let support know so we can improve it.
After looking through the list simply click the check button at the top right of the screen and your transactions will be imported for you.
After Import
At the moment Centsible only imports your transactions without a category. This means that your budget will not immediately be affected until you assign categories yourself. Transactions that need a category will show "Category Needed".