Getting Started
Welcome! This getting started guide is meant to help you set up your first budget in Centsible. A few things you should have on-hand when getting set up.
- A list of your monthly bills.
- Your accounts and account balances.
Step One: The Budget
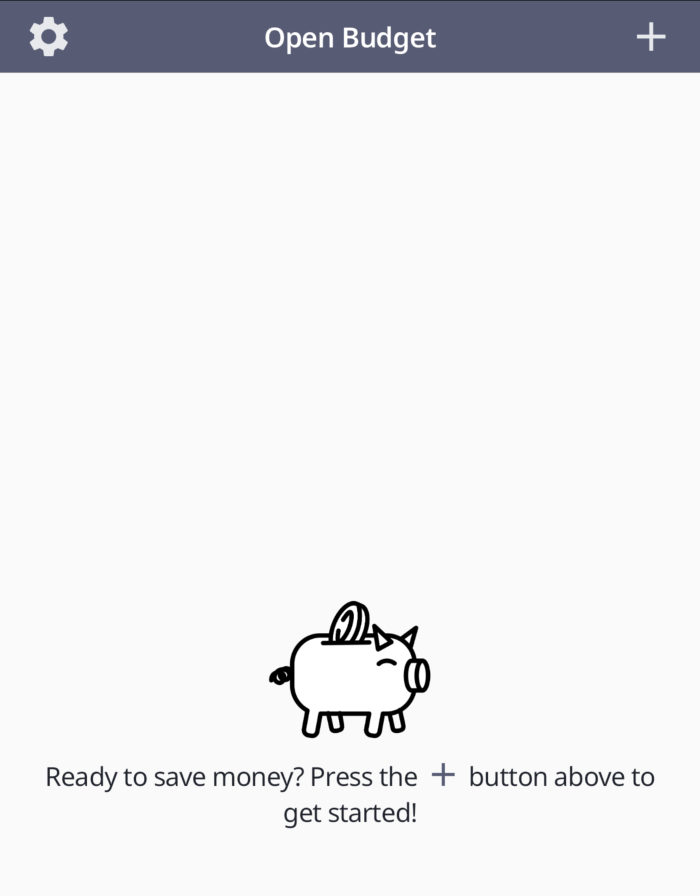
When you first sign up, the first screen you'll see is the "Open Budget" screen. This screen will list all your budgets. Budgets are generally made up of accounts, categories, and transactions. For simplicity just add a new budget. We recommend "My Amazing Awesome Budget". Once added you will see it as part of the budgets list. Click on it to get started.
Step Two: Monthly Bills
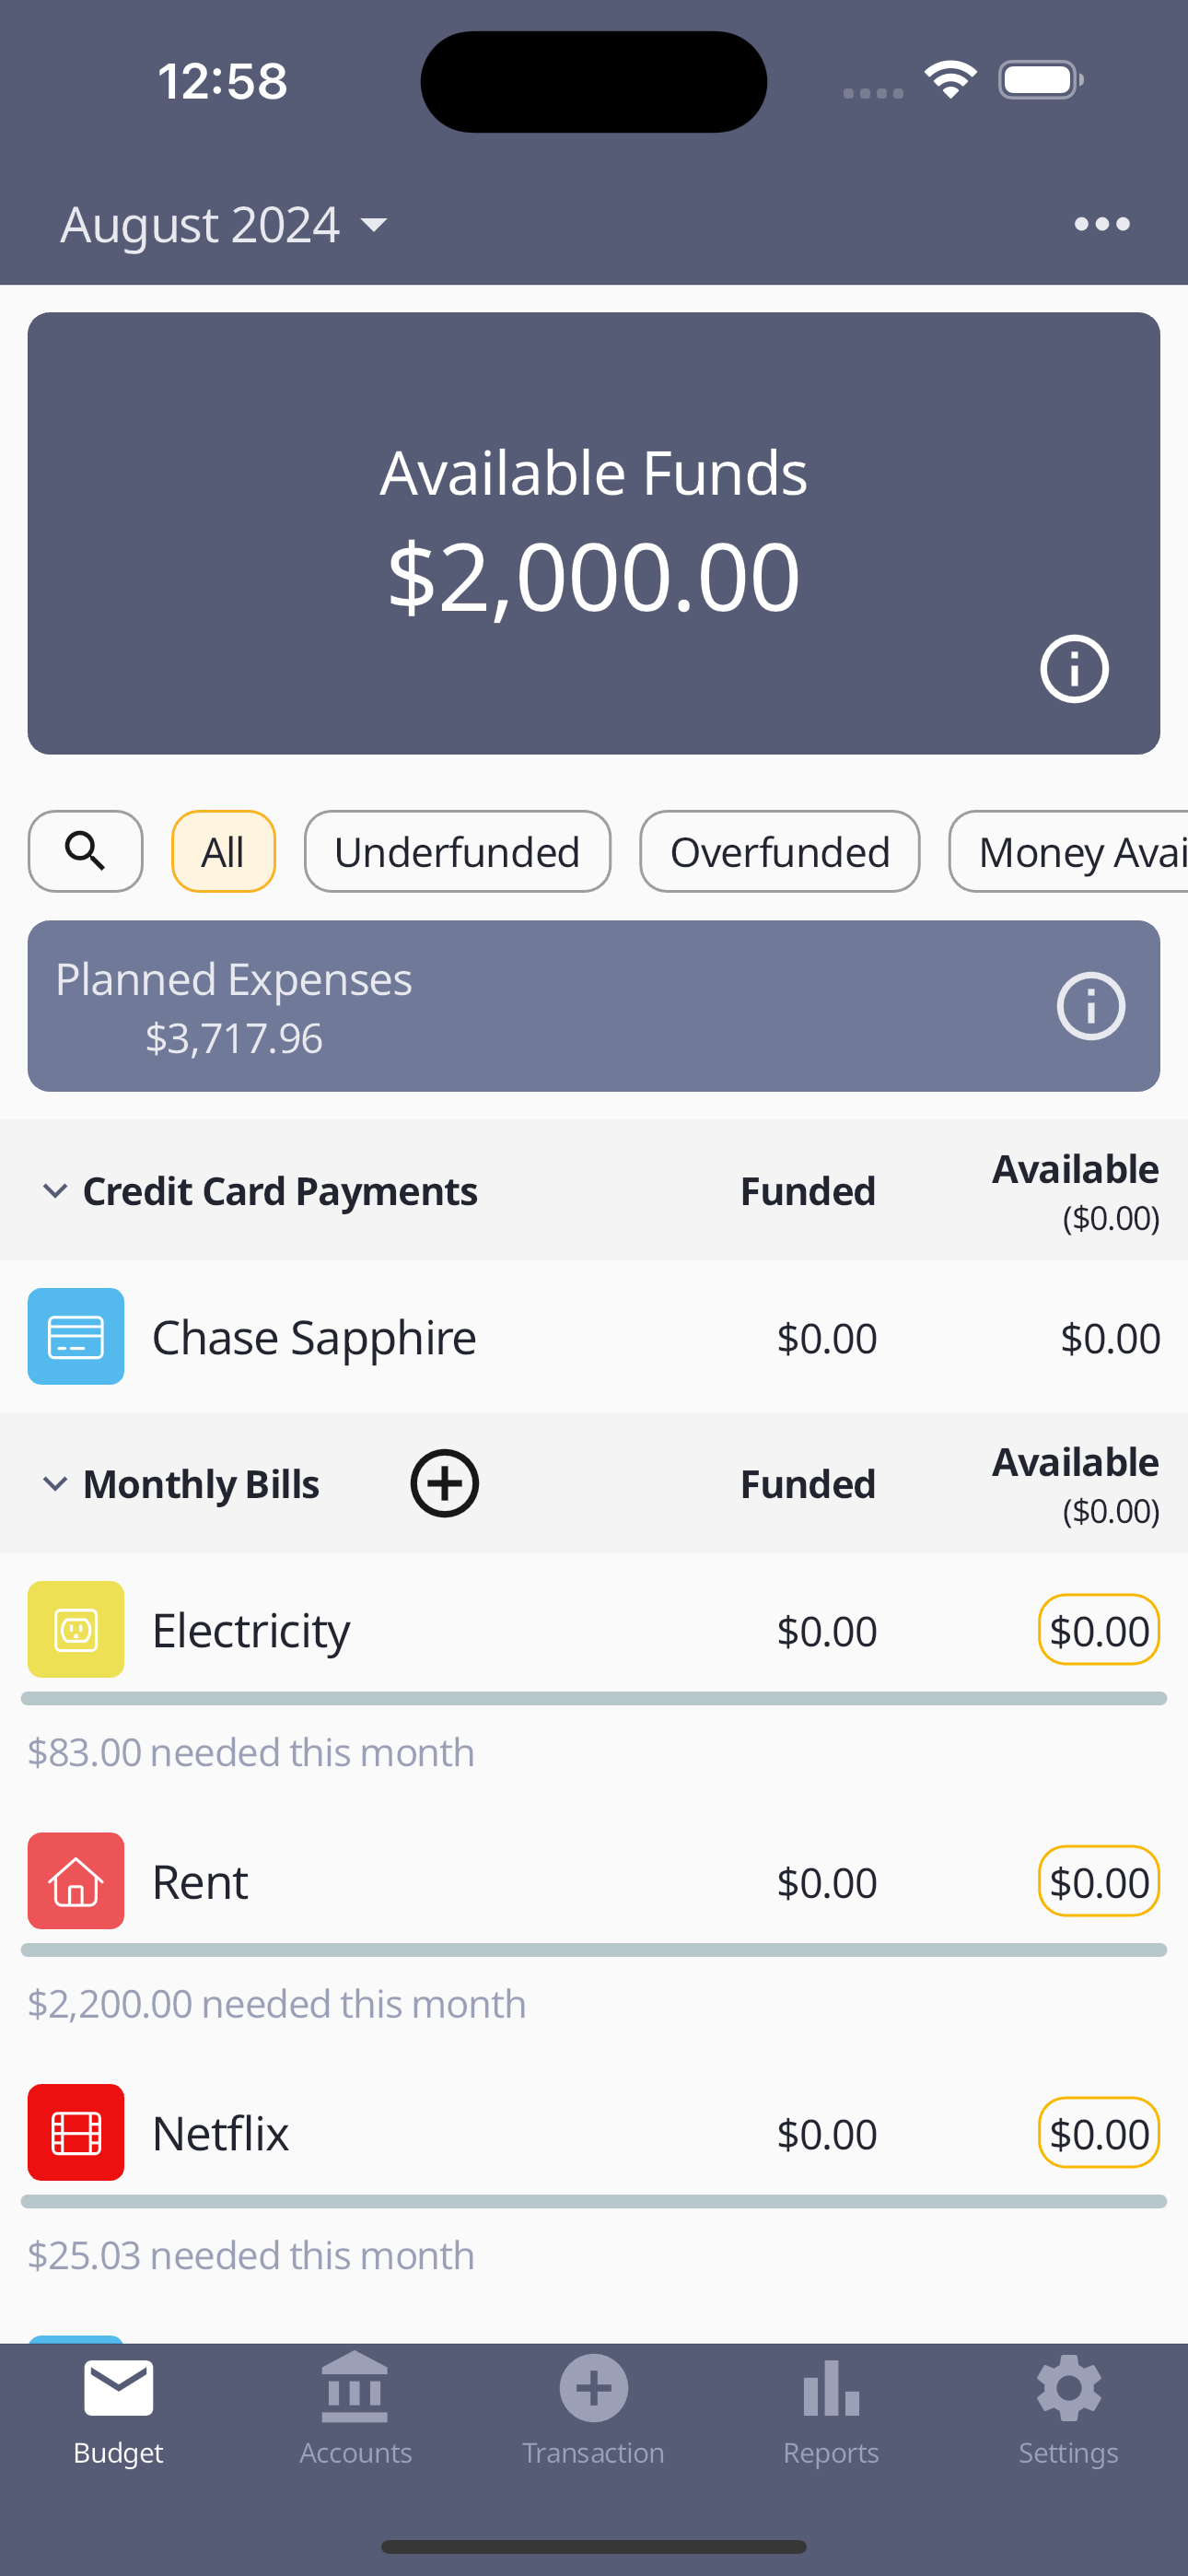
When selecting a budget you will be taken to a screen that looks like below.
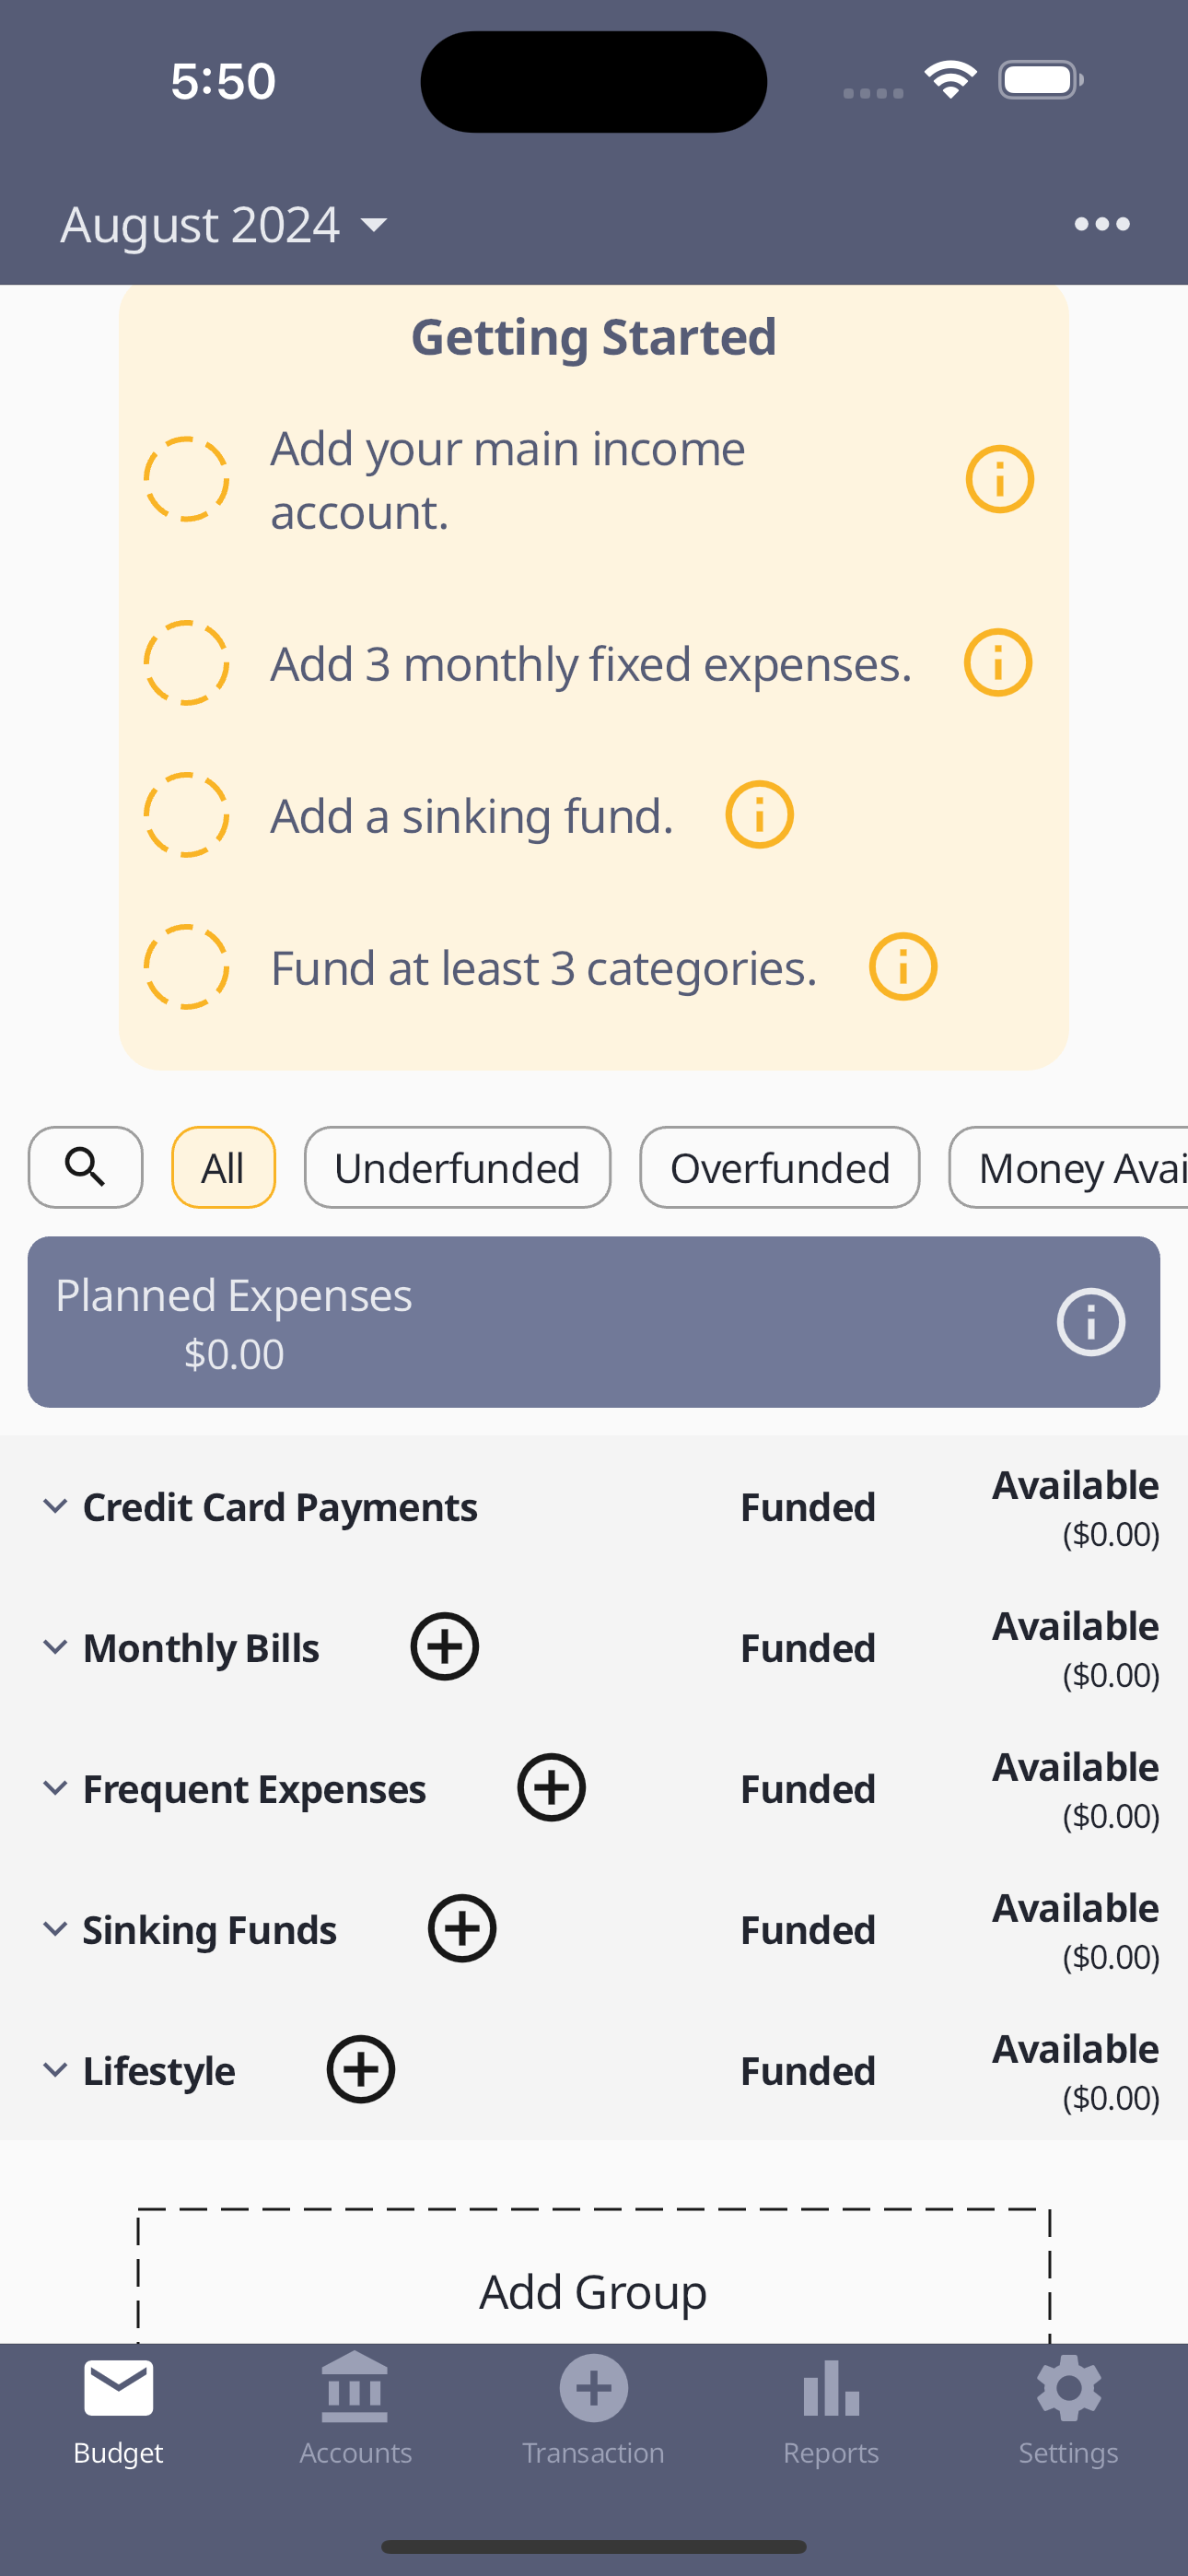
By default you get a basic budget structure. The bolded categories are called "category groups". Any category you add must be part of a category group. These exist for structure.
You can rename or delete all the default category groups, except Credit Card Payments. They're only defaults to help you get started. You can add additional category groups at the bottom of the budget screen by clicking the "Add Group" button.
Next to the Monthly Bills category group, click the plus icon. This will pop up a bottom sheet for actions you can take. This is where you can add a new category. Begin adding all of your known monthly expenses here.
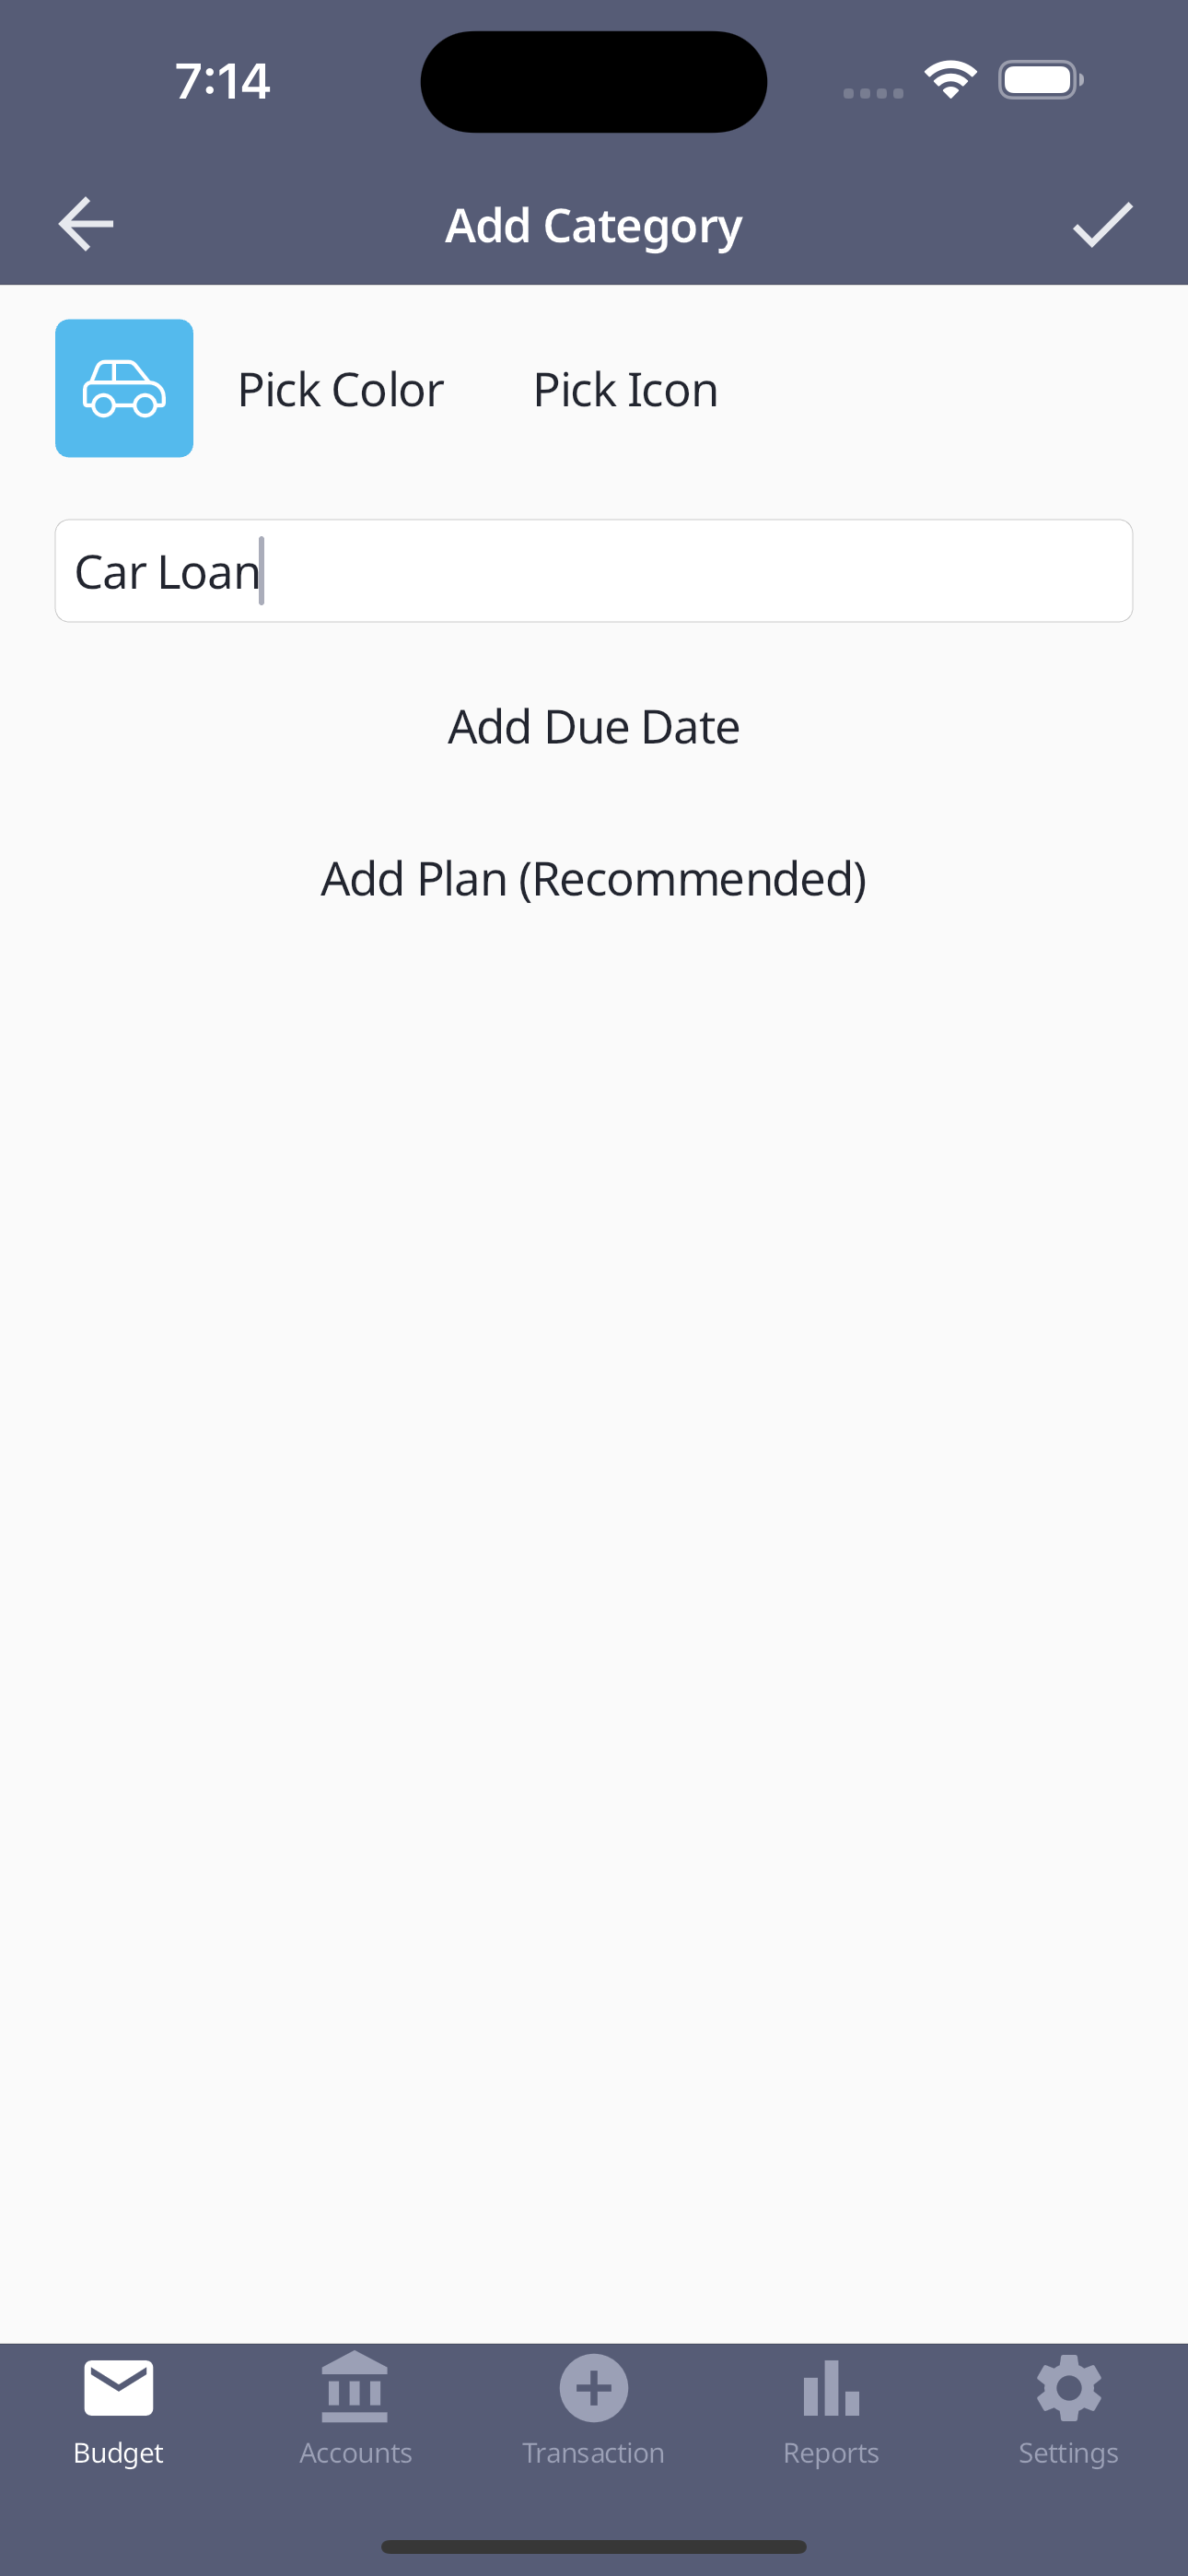
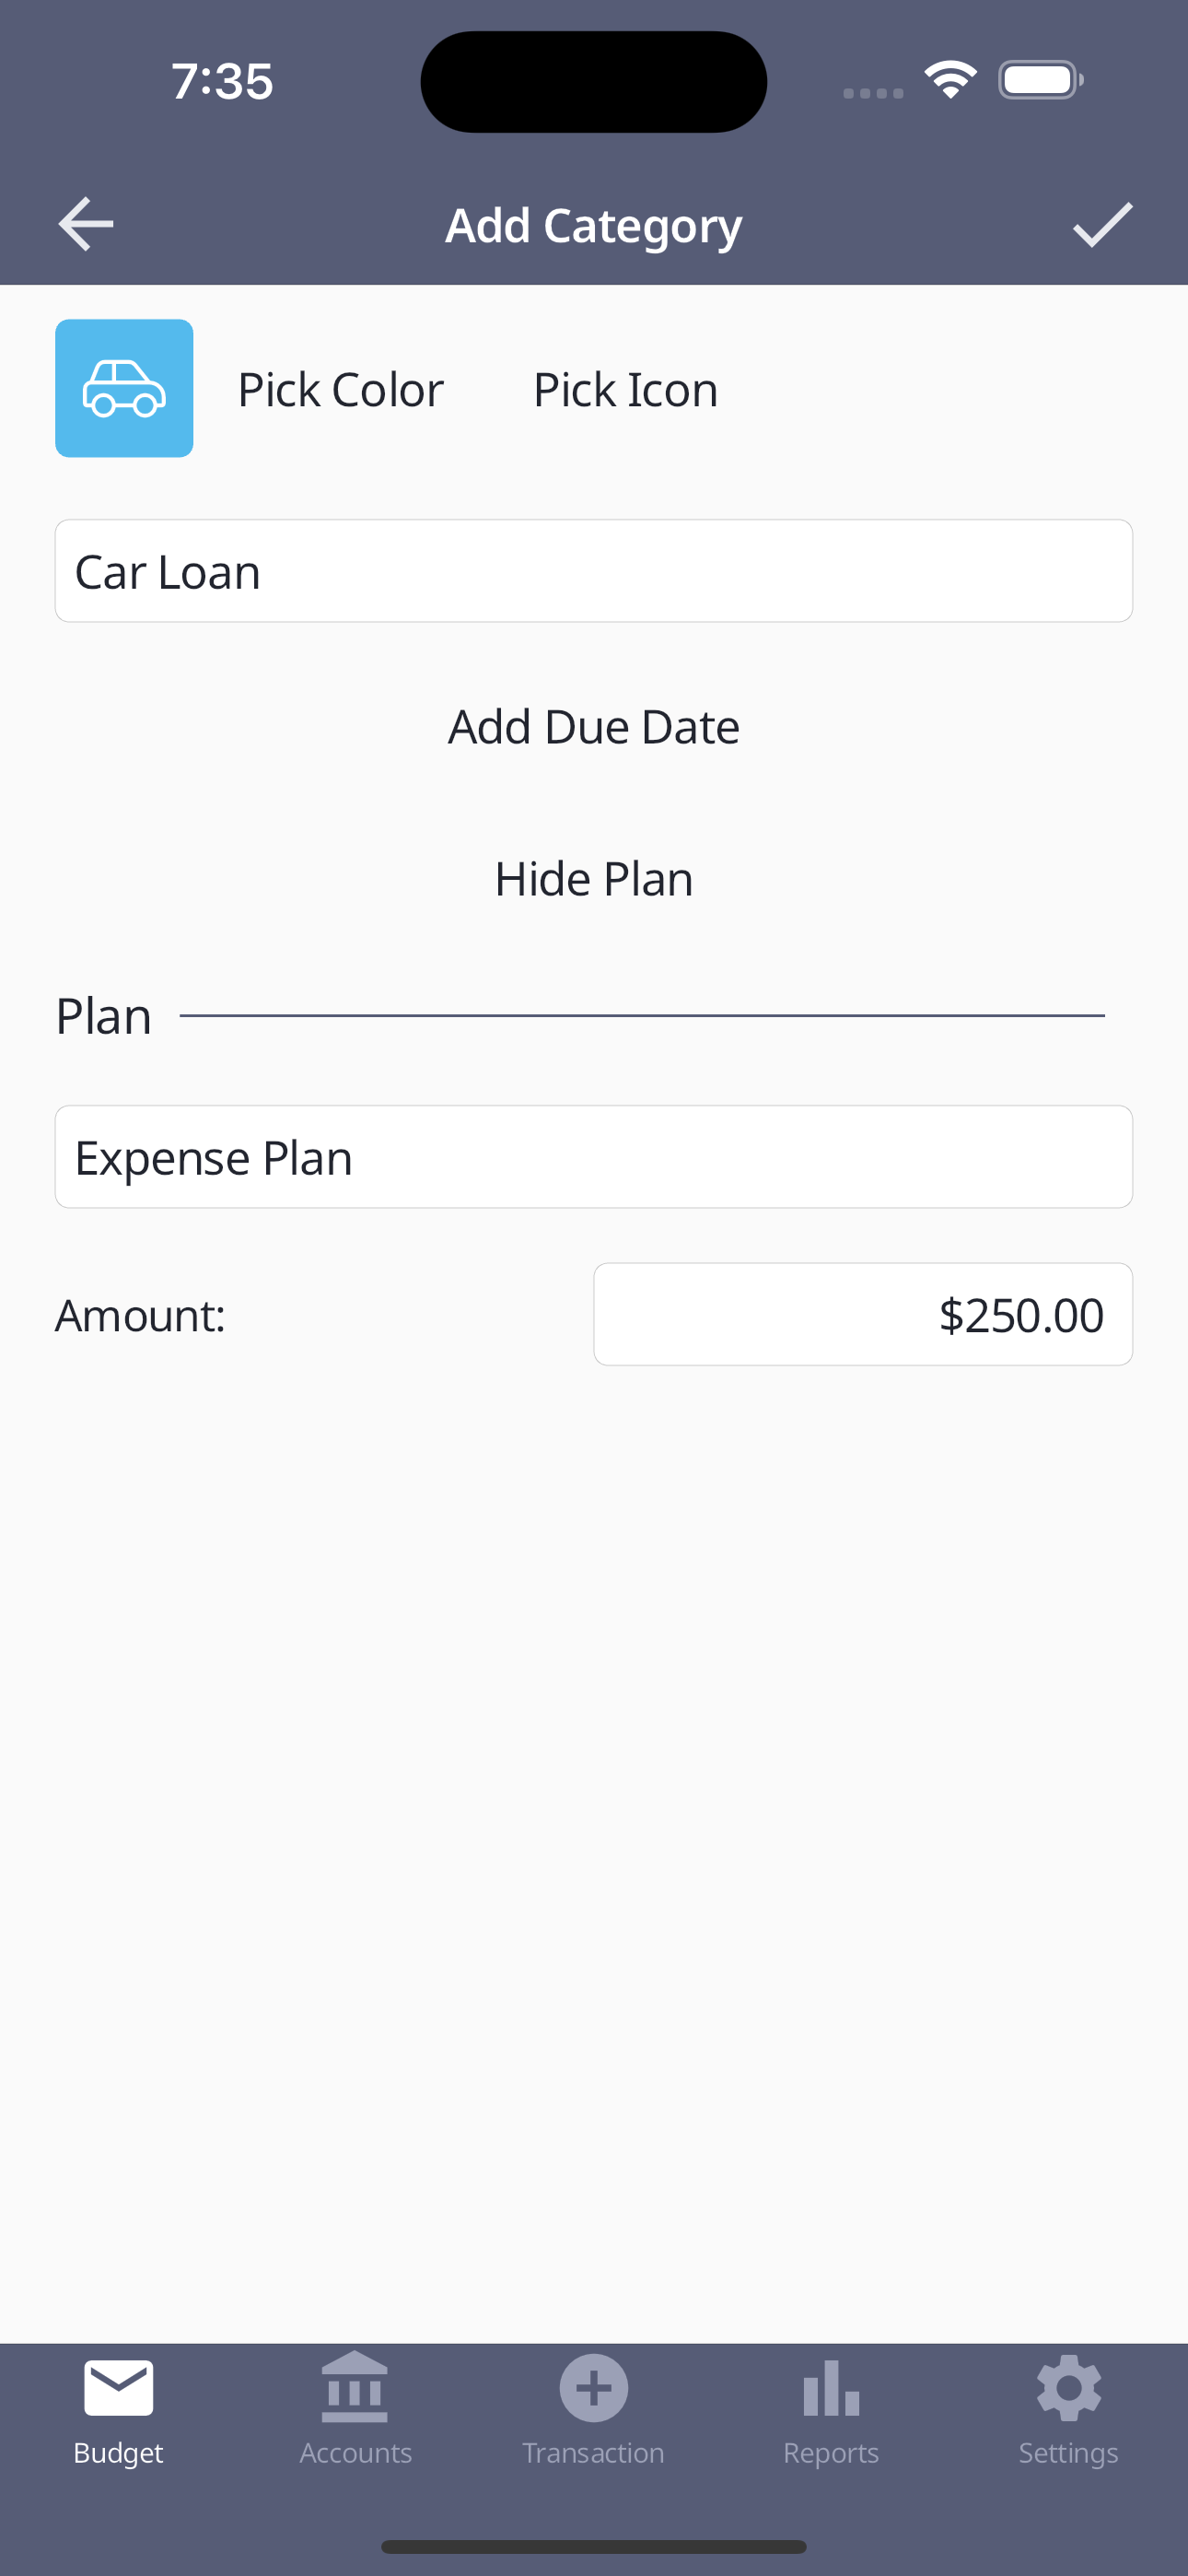
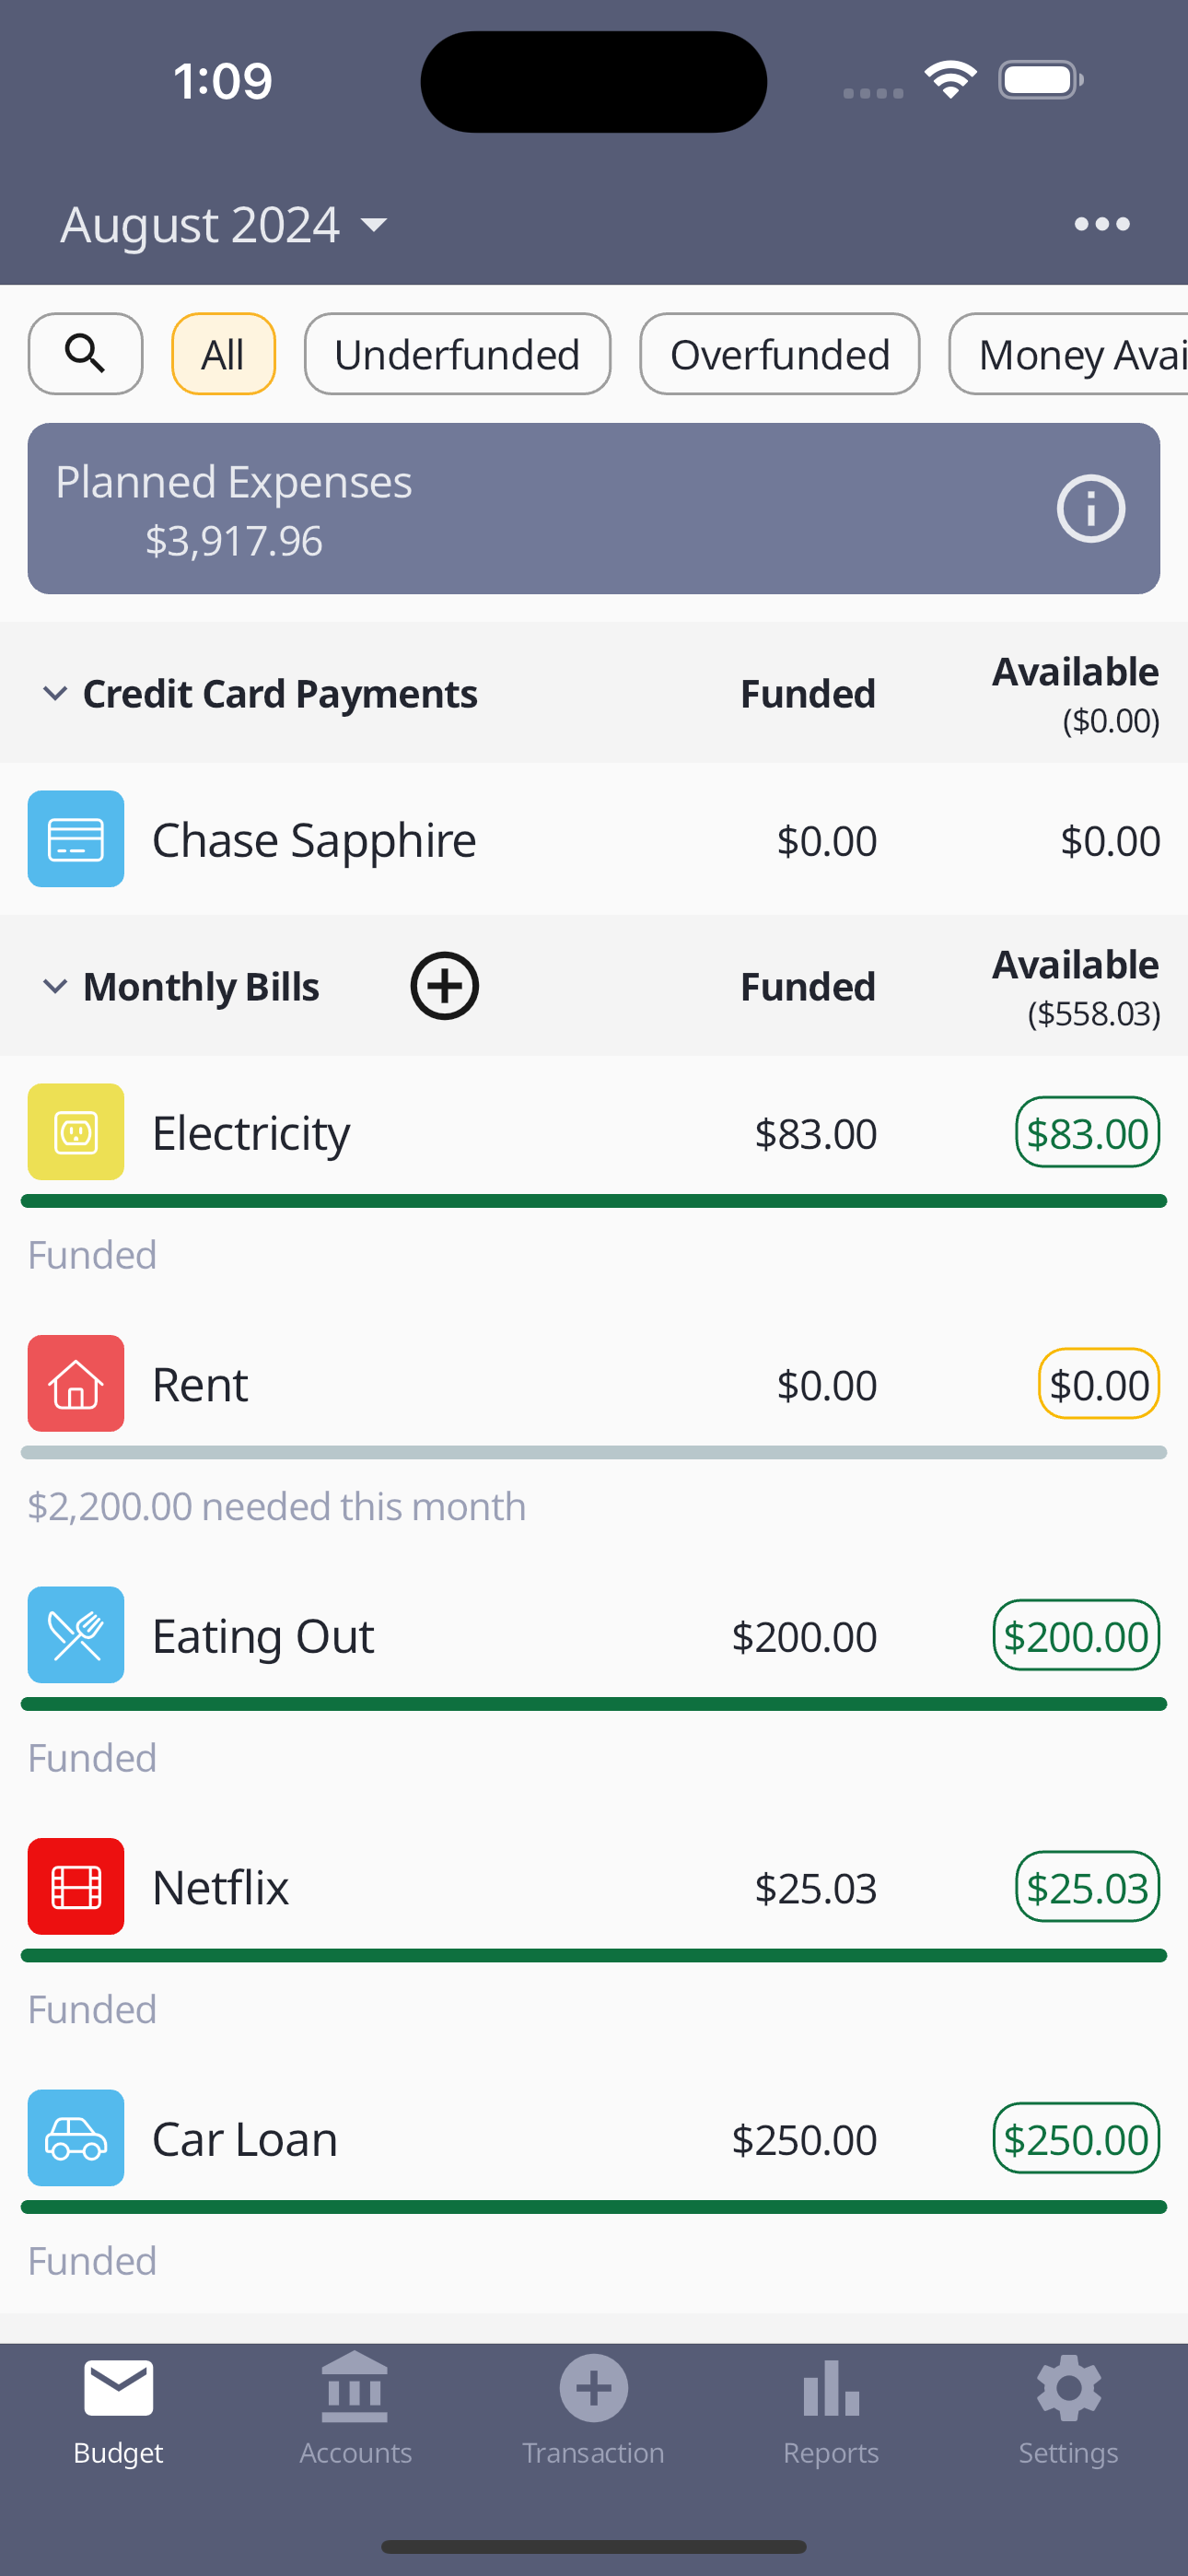
While adding categories it's highly recommend you click "Add Plan (Recommended)". This will show a section to add a plan to your category. Select Expense Plan and enter the amount your bill is.
Assuming you added all your monthly expenses, you overall plan is beginning to take shape.
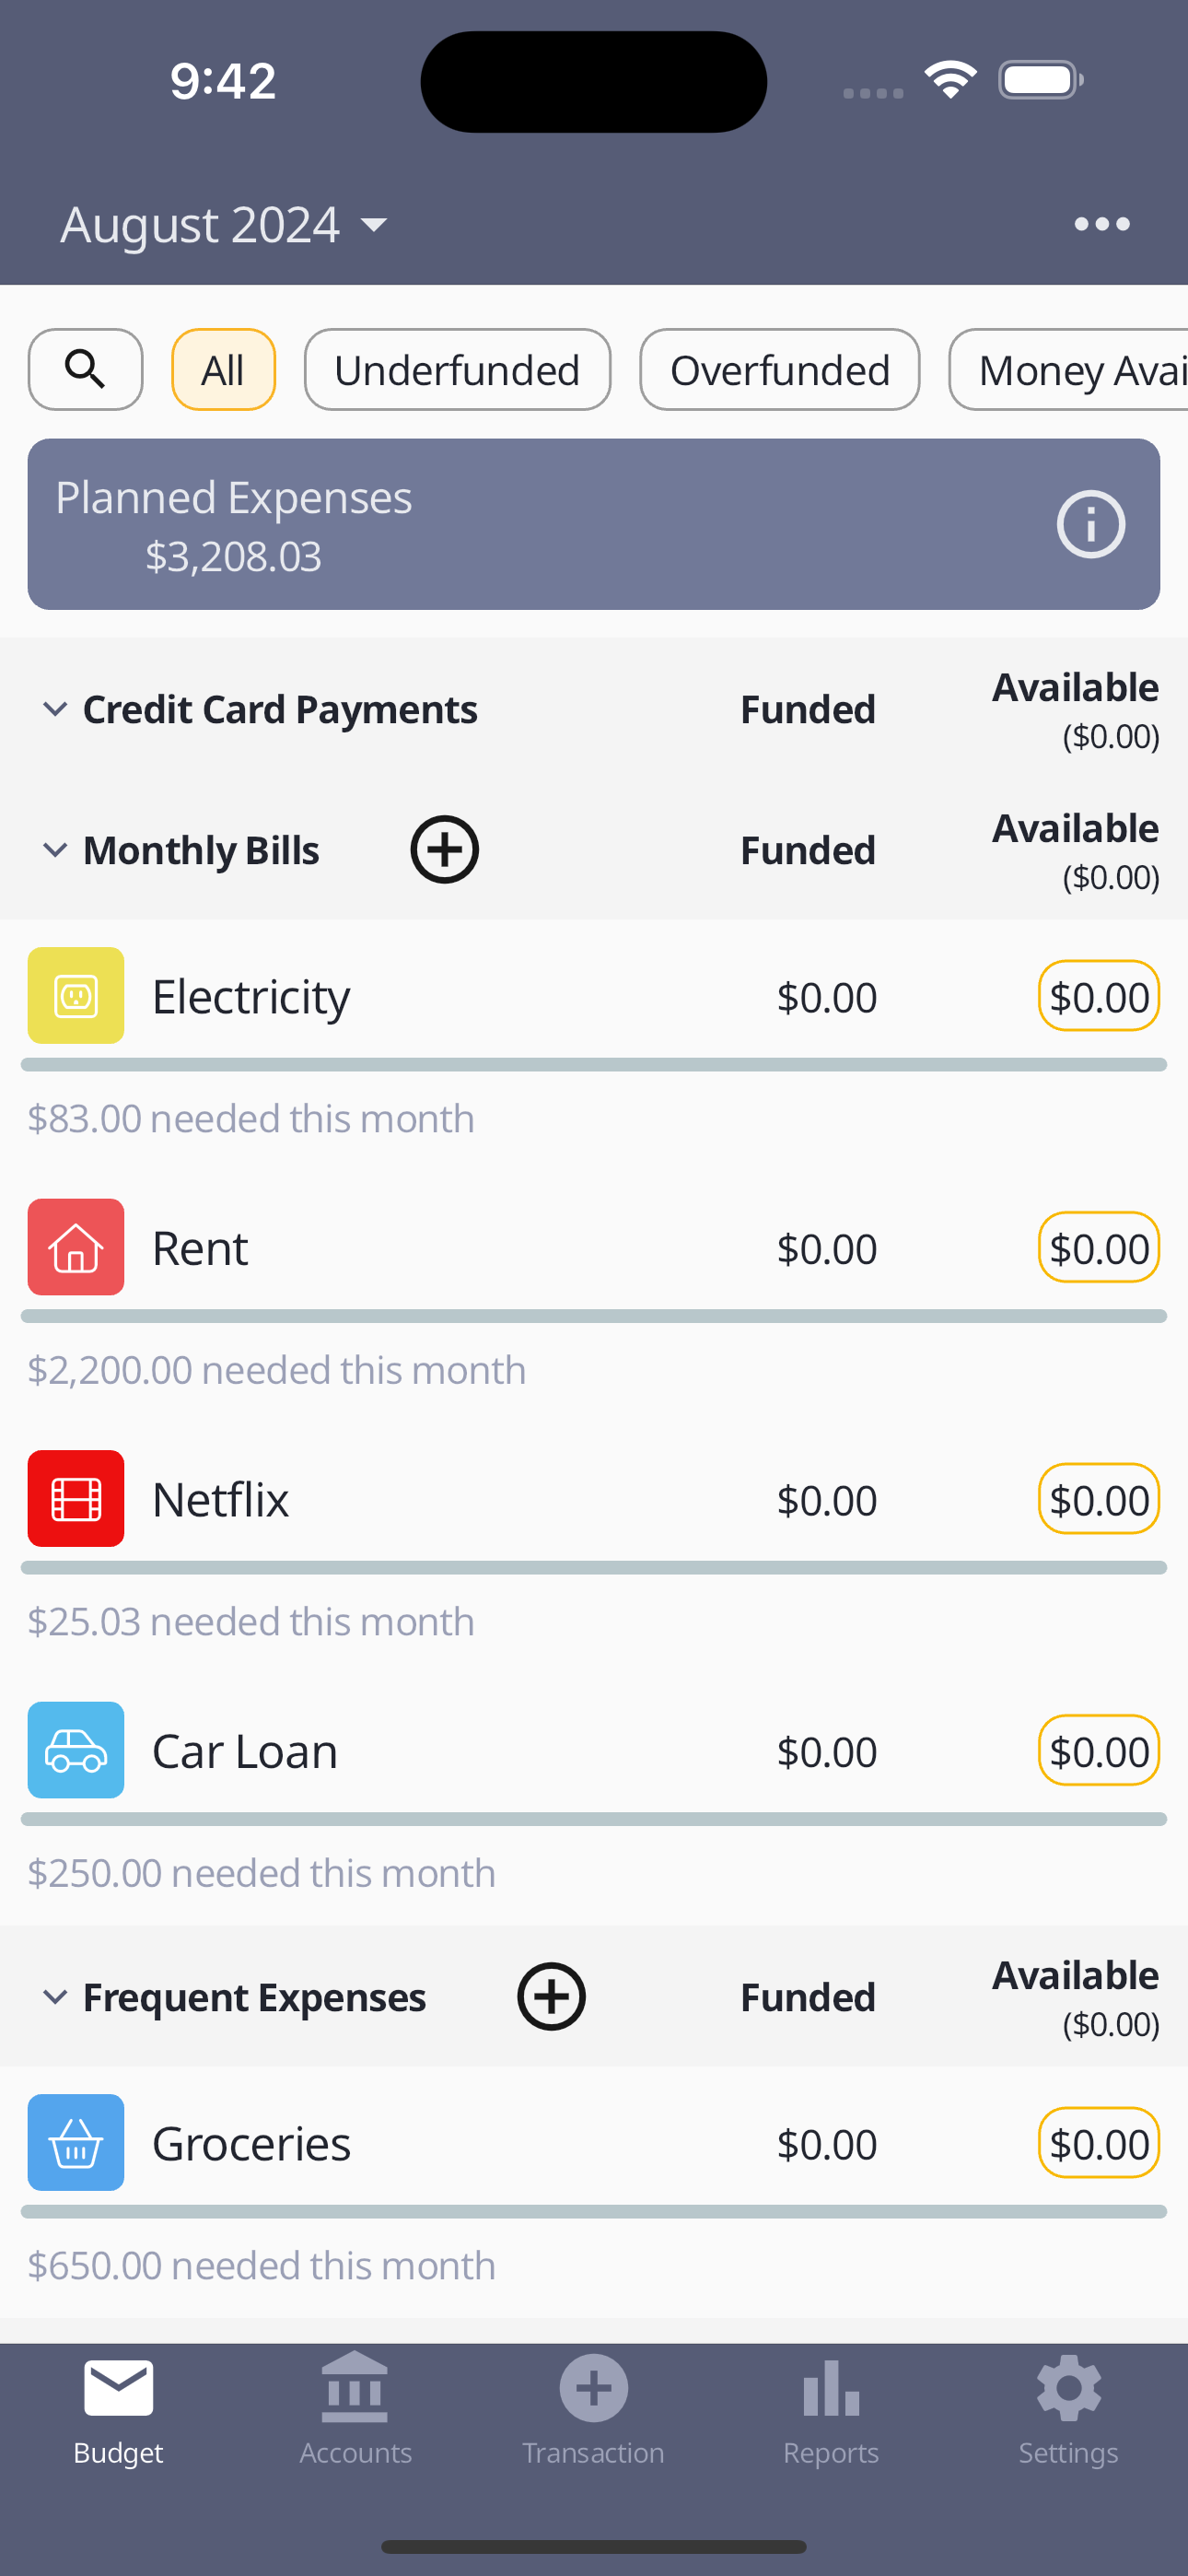
As you can see in the example screenshot above, you are shown how much each category needs this month. As your pay comes in you don't have to guess how much each bill requires.
More importantly though, focus on the Planned Expenses widget. That number will tell you exactly how much money you need to be making in order to afford your current monthly expenses. This is important information as you are likely making more than this. Meaning whatever is left over is what you have available for short and long term savings. With this information on hand, let's move on to the next section.
Step Three: Non-monthly
Typically people only think about their monthly expenses. As the year progresses things constantly pop up. Maybe its something small, like a subscription of about $100. But it can also be something bigger, like new tires, car maintenance, or a larger medical bill you didn't see coming.
You spend the year attempting to save, but wind up frustrated when you have to dip into your savings. The budget ends up taking the blame. But it doesnt have to be this way. Let's look at an example.
In the United States, an Amazon subscription costs $139 per year. You could take the hit one month and save for it once. But surprisingly many people pay for it monthly. It's $14.99 per month. That comes out to $179.88 per year! You're spending $40 bucks extra to avoid feeling the pain of the $139. Why not save for the $139 monthly? You can do this in Centsible by using a Monthly Expense Plan By Date or Monthly Savings Plan By Date.
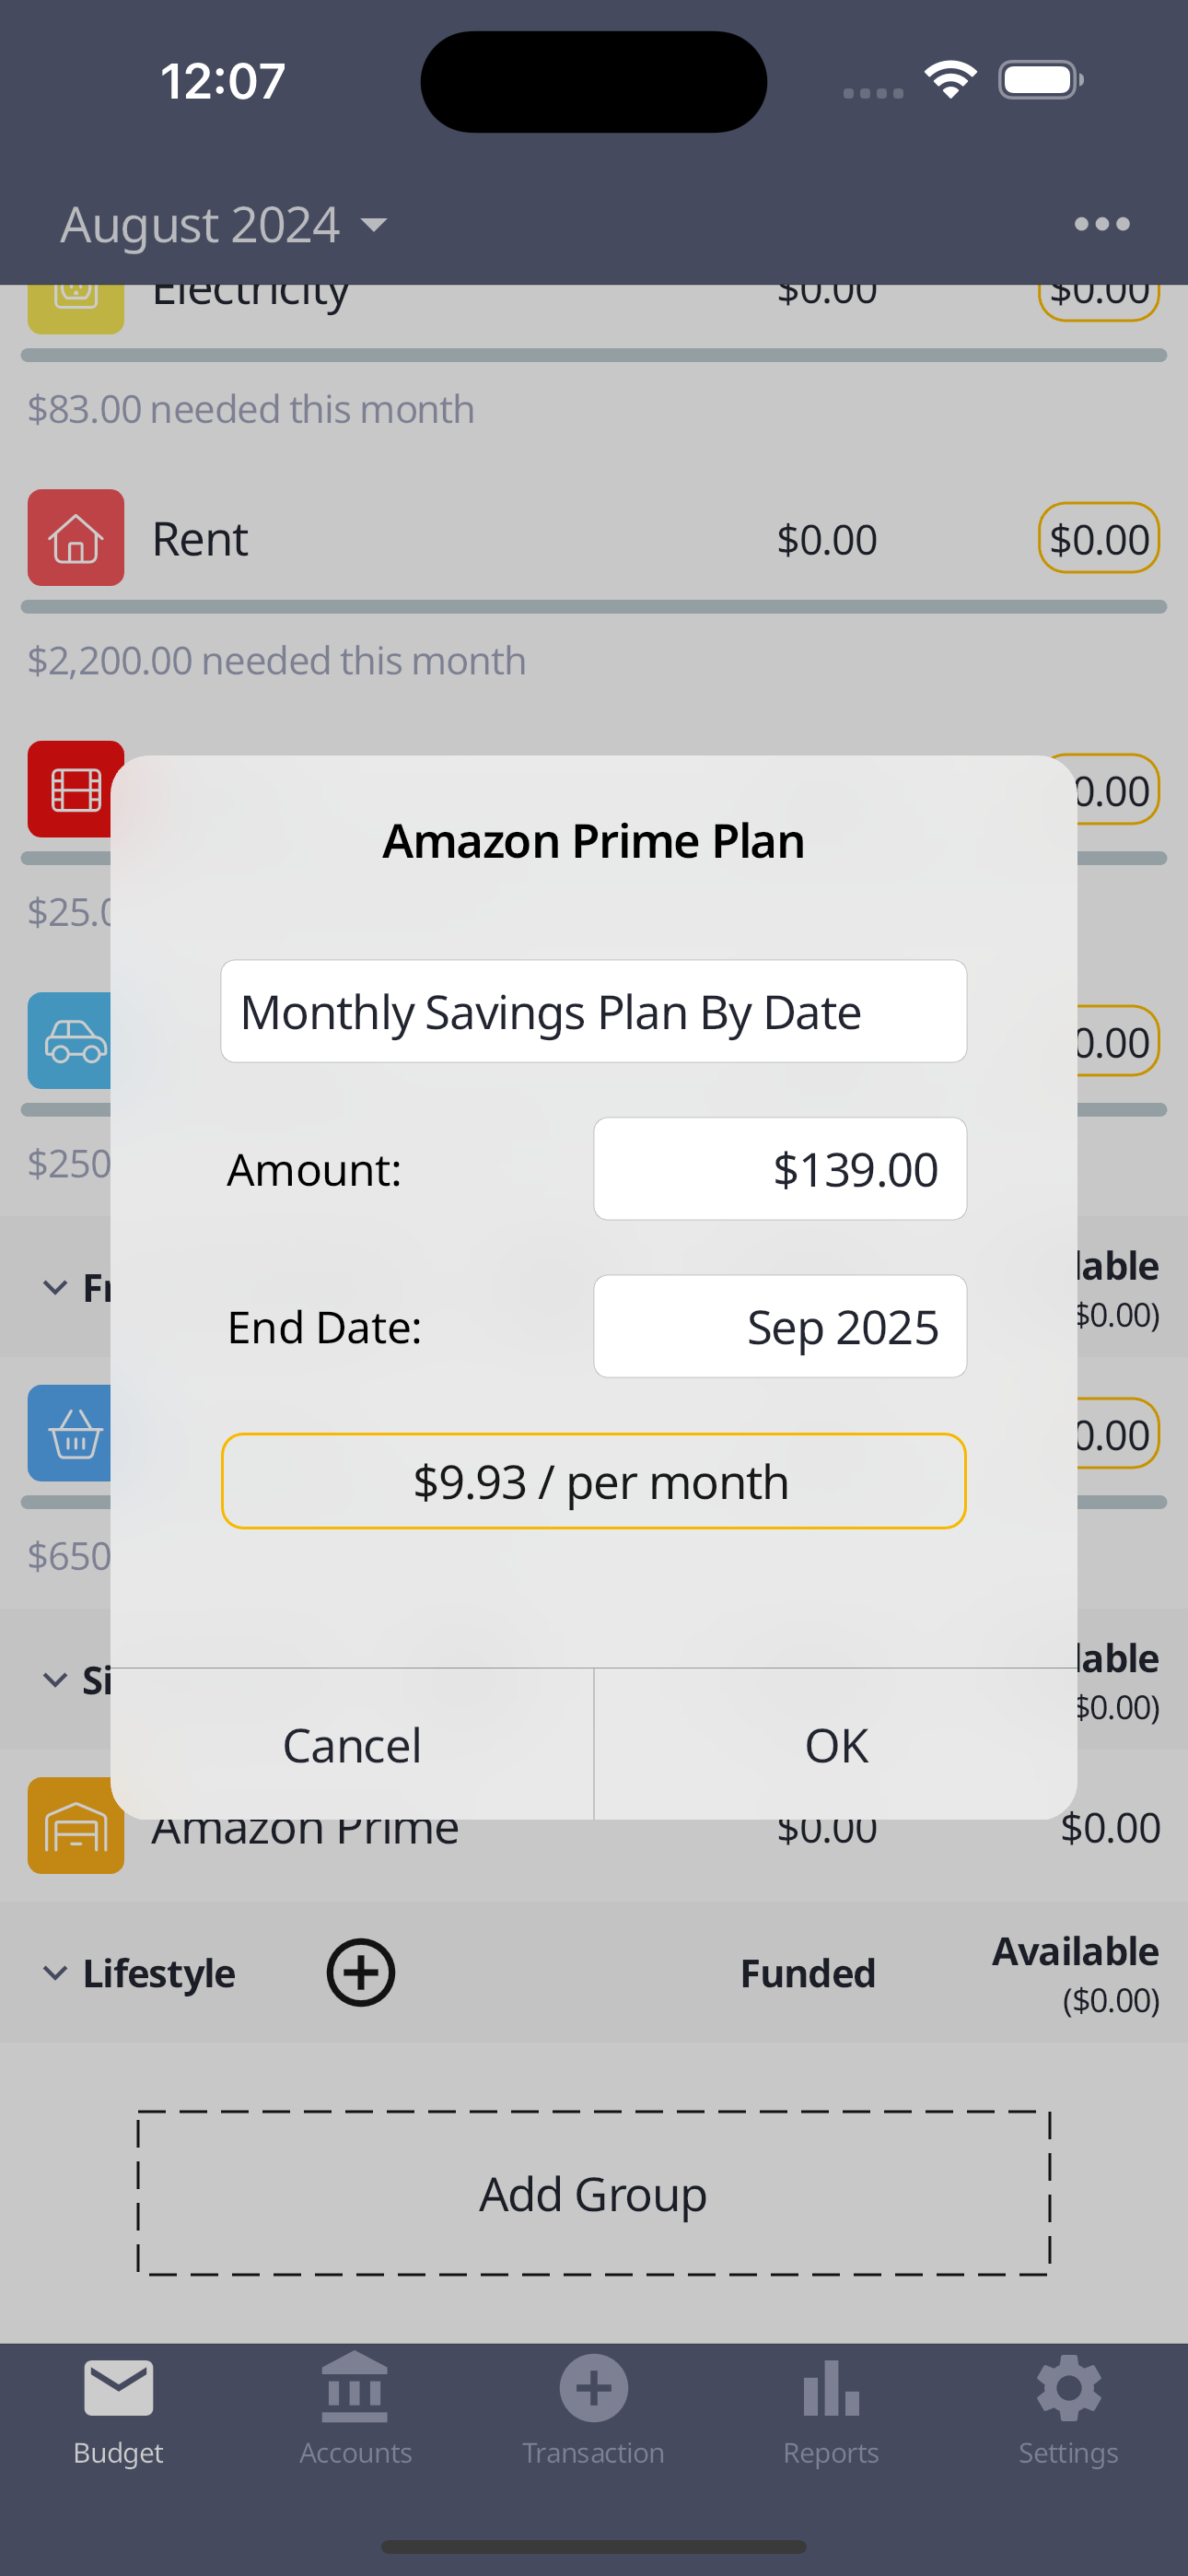
In the above example, Centsible will remind you to set aside $9.93 per month until the subscription renews. To some this example is pointless as you may prefer to just save for the $139 and forget about it. And that is fine. But if money is a little tight, breaking down a larger purchase into smaller more manageable amounts is powerful.
Let's take another common example, car maintenance. In the United States the average maintenance cost of a car per year is about $900 in 2024. Imagine having to move money away from other savings goals in order to pay for a repair? Let Centsible do the math.
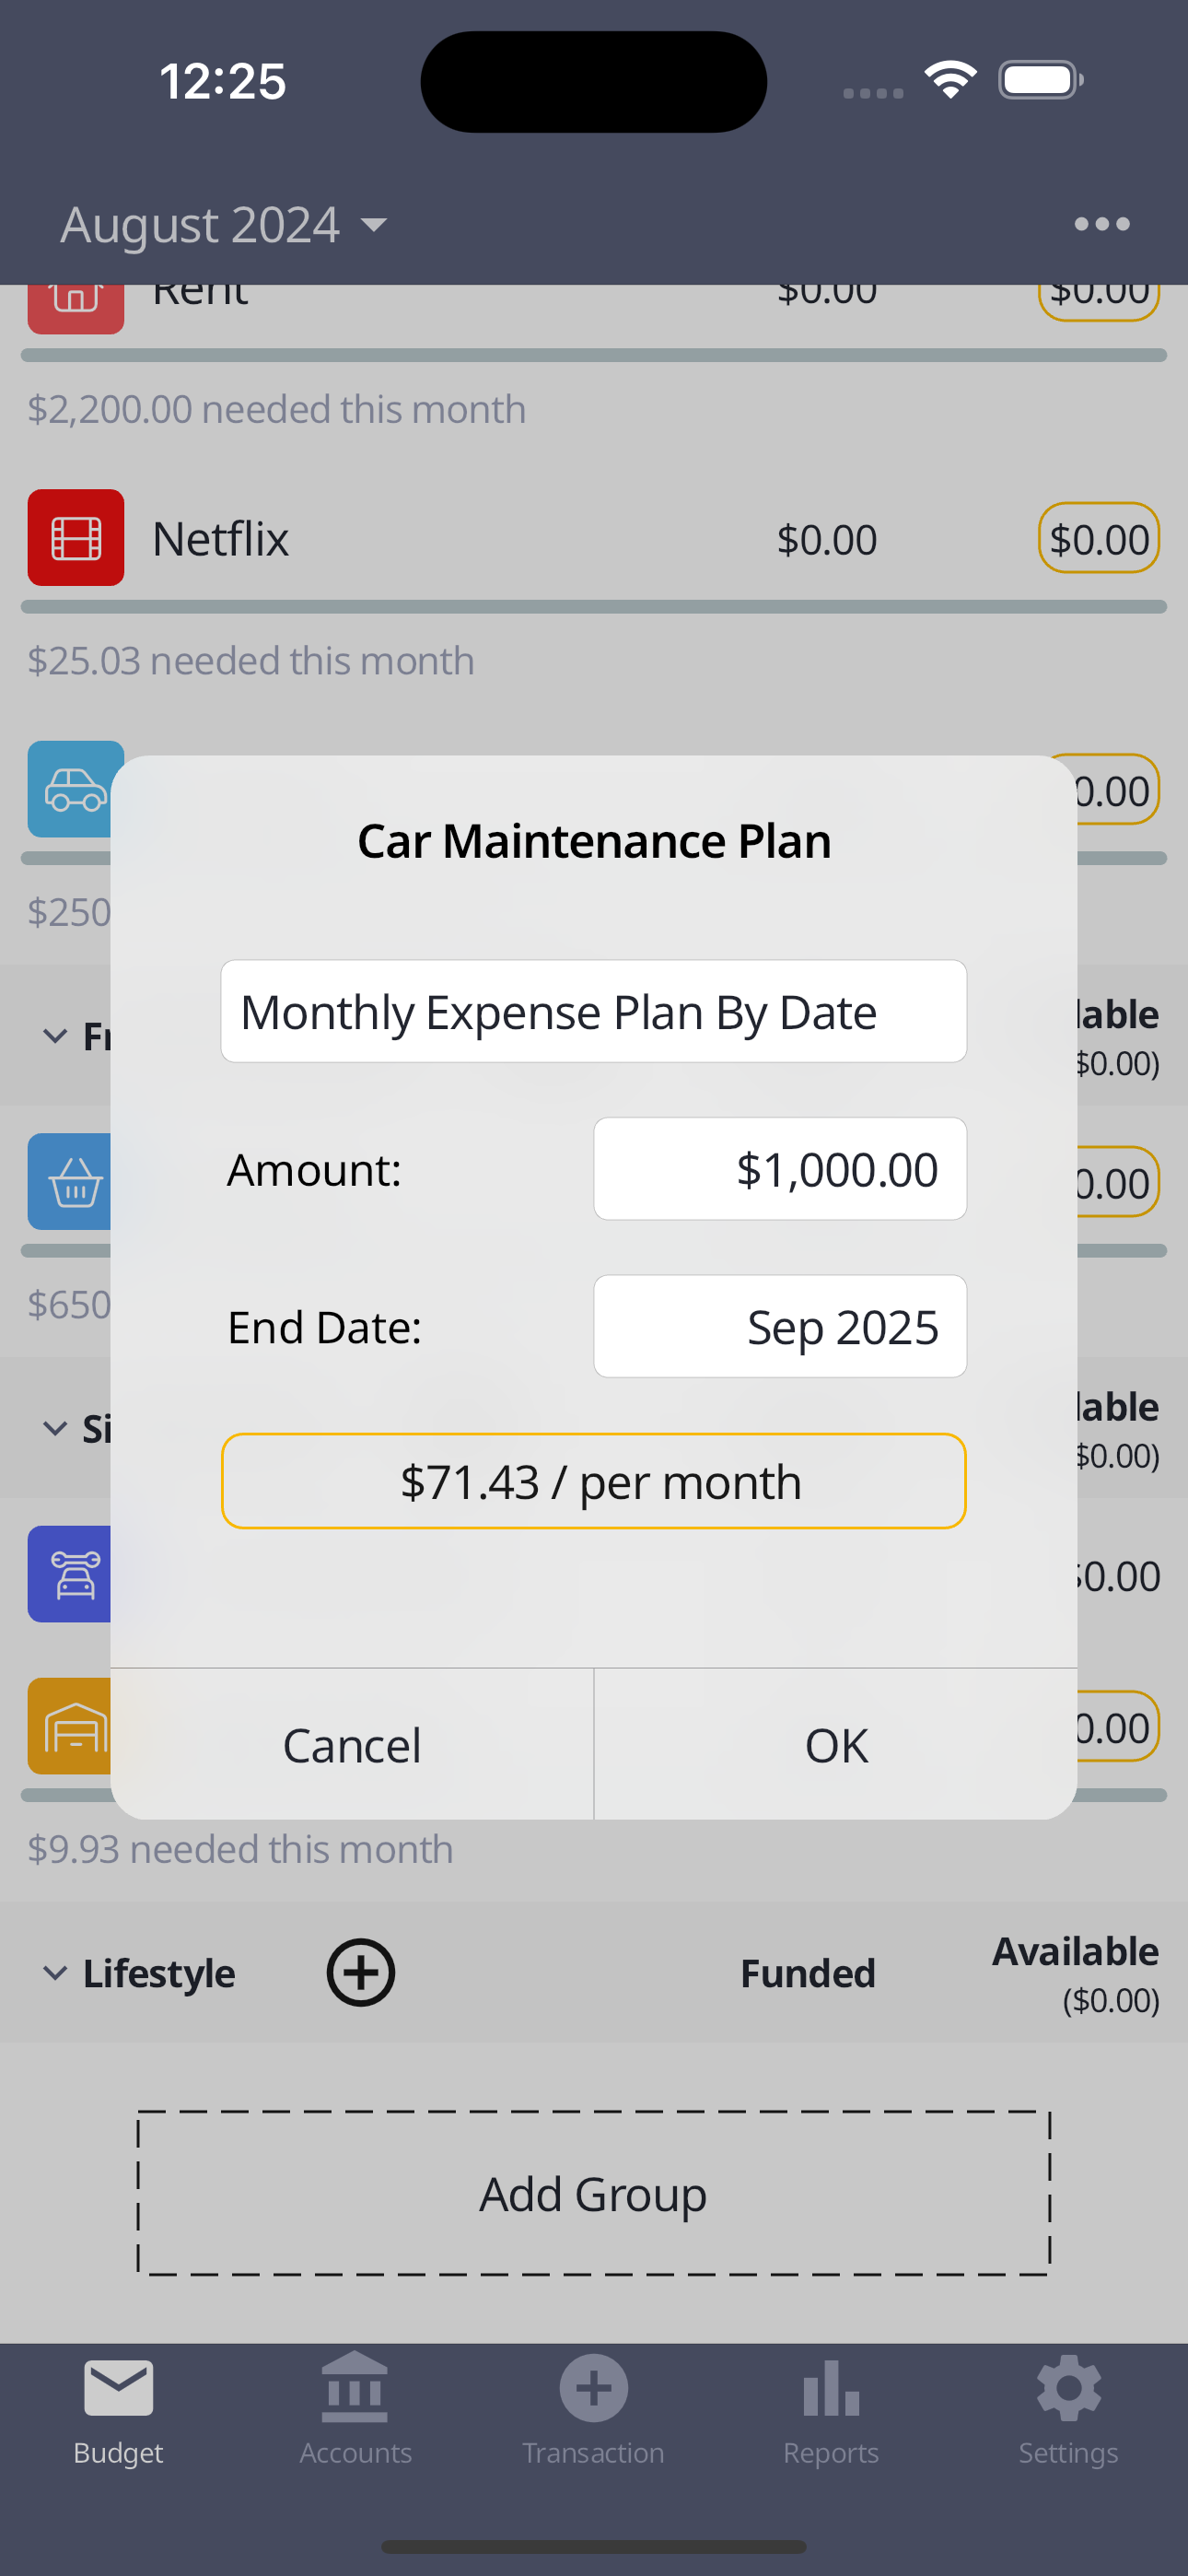
$71.43 is a much more manageable number. The best part is you can do that with your other savings goals. You can divide and conquer all your possible non-monthly expenses to come up with a plan that fits within your income. The best part is all of these plans affect the Planned Expenses widget. You'll know if what you are saving for is realistic.
The goal is for the Planned Expenses total to be as close to your monthly income as possible. Your overall plan should not only include expenses, but also saving.
Here's a list of some common non-monthly expenses you should consider adding to your budget. Some may not matter to you. Simply use the categories you need and apply them to your budget.
- Subscriptions
- Car maintenance
- New tires
- Medical out-of-pocket maxes.
- Car insurance
- Home insurance
- Kids extracurriculars
- Birthdays
- Christmas
- Home repairs
- Pet insurance out-of-pocket-maxes
- New phones
- New laptop
- New car
Step Four: Accounts
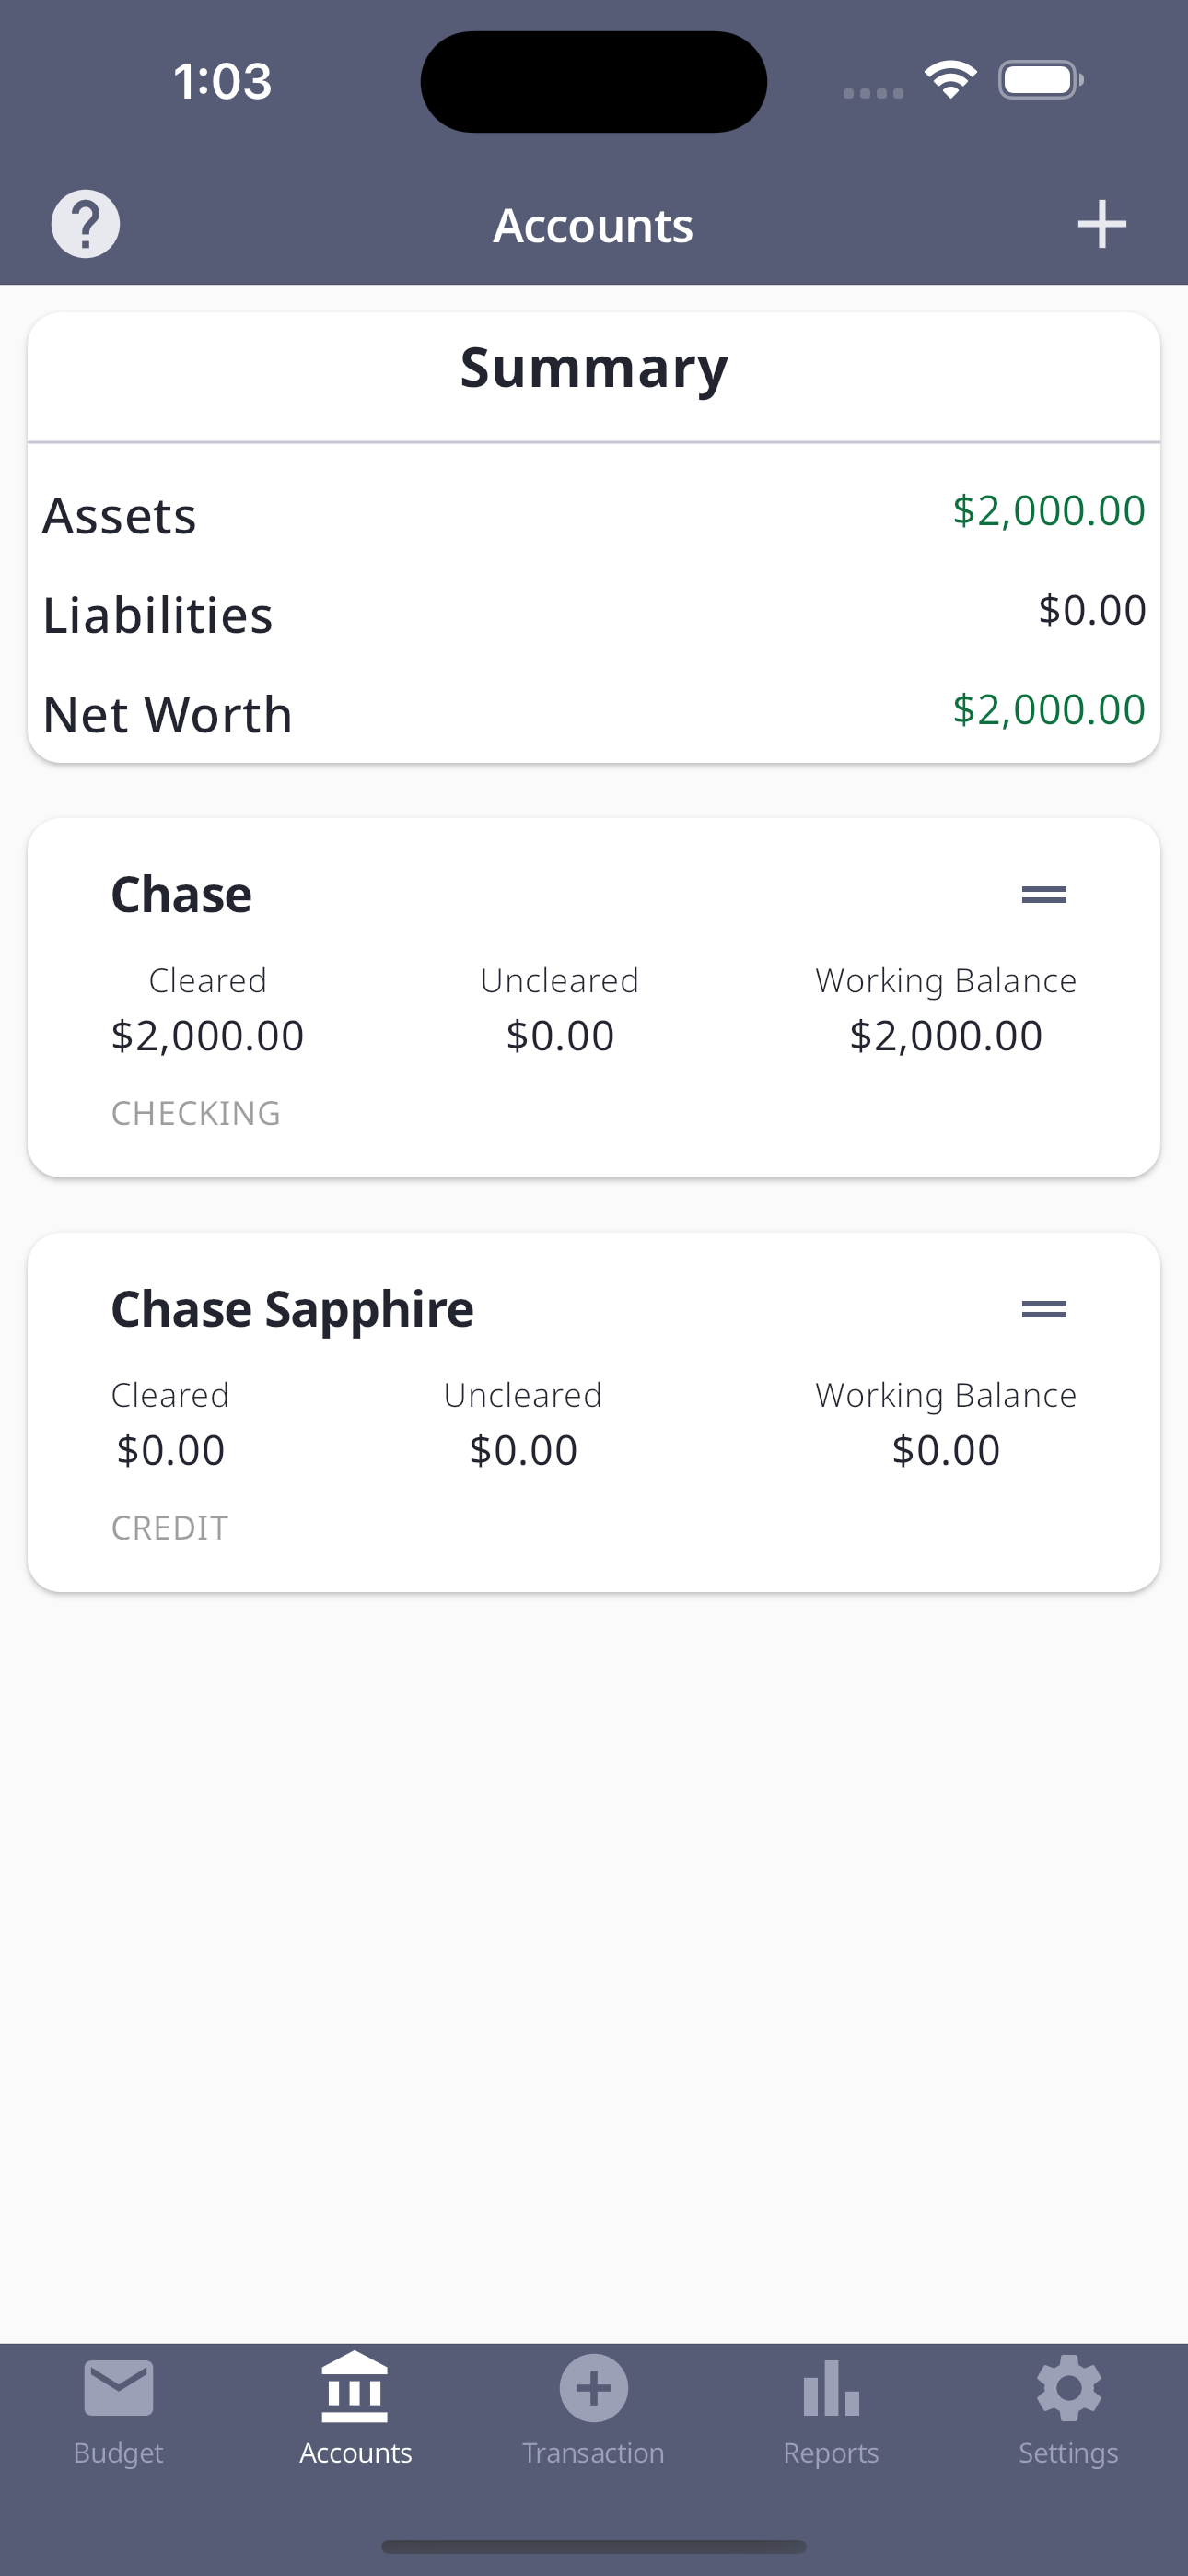
The last step is to add your accounts. You do this by clicking on the accounts tab, and click the plus icon at the top right. For simplicity we are only adding two accounts, a checking and credit account.
In the first three steps you focused on creating a plan. Now you begin to utilize your plan as income comes in.
Your goal is to fund your categories from the money available in the Available Funds. This money comes from income in your asset accounts. This can be checking or savings. Imagine "Available Funds" as a stack of physical cash that you must put in real envelopes. In fact, Centsible is based on the envelope budgeting method. You can't put money that doesn't exists in your real envelopes, so you can only fund your categories with money that's in "Available Funds".
If you try to fund your categories with more money than you have in "Available Funds", you will see a big red warning. If there are negatives, you can't trust your budget.
In the end you will wind up with something that looks like this:
The "Available Funds" widget will disappear if it's $0 to save space. If it's positive it'll persist at the top to nudge you into giving your dollar a job. If it's negative it'll be big and red so you can't miss it.
You Have a Budget!
Congratulations! You have a budget. Don't worry if it isn't perfect. It'll take a few months to get in the motion. At this point all that's left to do is to track your expenses. Manually enter all your transactions as they happen, or input them at the end of the day. For best results input it right after you make the purchase. You can also move money between your categories as things happen. You are in control of your money. Good luck.